
Carnitas
If you have a pulse, you know what carnitas are and that they are delicious. This is all that this post requires of you, so fear not the history lesson.

The stuff carnivorous dream are made of.
If you have a pulse, you know what carnitas are and that they are delicious. This is all that this post requires of you, so fear not the history lesson. However, if you, like me, like a little insight with your tacos, read on.
The birthplace of carnitas is usually credited to the state of Michoacán in Mexico, but there is at least some debate about that, with other origin stories pointing to Mexico (the state), Hidalgo, Jalisco, or Querataro. Certainly the styles of the carnitas from these areas vary, with the base recipe supplemented by different spices, as well as different liquid additions: orange juice, beer, Coca-Cola, and even milk.
What they all have in common is the method of cooking the pork. If you have read my post on duck confit, it will strike you as very familiar. Carnitas consist of pig meat, cooked in its own fat.
Traditionally, this happens in a cazo de cobre - or large copper pot - filled with lard. Here, the pork is cooked slowly, at low temperatures, to tenderize tough but flavorful bits of the hog such as legs and shoulders. The lard is often kept in the cauldron to be used again and again.
I have two things to tell you about this method of cooking. One is sciency, and the other is historical.
(Note that I will be referring to “meat”, “chunks of meat”, “pig meat”, “pork” and “meat fibers” quite a bit. If you are either grossed out or titillated by this, stop distracting the class and grow up. I am feeling carnivorous and not in the mood for your nonsense.)
First, history. Cooking in fat, whether frying or slow-cooking, is a method that was imported to Mexico by the Europeans. There is a legend that when Cortez defeated the Aztecs, he celebrated by making carnitas. In point of fact, a monk documenting the happenings referred to swine being brought to the table, but anything beyond that is pure fiction. Carnitas are a celebratory tradition in many parts of Mexico, and I don’t think there’s any reason to dishonor them by association with that particular dude.
Next, science. Collagen is the stuff in meat that makes it tough. There is very little collagen in tenderloin, and quite a bit in beef shank, duck legs, and pork shoulder. When you heat collagen at high temperatures, it tends to shorten, squeezing meat fibers and making them release water. If cooked in an oven, on the stovetop or on a grill, this water will evaporate, drying the meat. The shortened collagen fibers, not given enough time to break down, make the meat tough.
However, if you cook that tough cut at a lower temperature - right around 160F - the collagen will begin to break down. Given enough time, it becomes a silky mixture of peptides and proteins known as gelatin. If that meat is cooked in fat, in a pressure cooker, slow cooker, or sous vide, any liquid released stays with the meat, hydrating the gelatin between the meat fibers and giving you a tender, juicy end product.
This is why I love science and you should, too.

Chunk-style pork, after its roasty-toast in the oven.
So let’s break it down (like collagen in a cazo de cobre)…
Carnitas need to be cooked low and slow, in a way that doesn’t allow the escape of their moisture. I have tried virtually all the methods of doing this available to a home cook. 1. Cooking the meat sous vide, sealed in bags containing all the yummy add-ins, then shredding and finishing in the oven for the mandatory brown and crisp edges. 2. Cooking the meat on the stovetop, covered in broth and those same goodies until it all breaks down and the liquids reduce. (This was my least favorite - a little messy, and though very tender and saucey, almost too tender without the crisp edges I wanted.) 3. Cooking on low in a slow cooker. My favorite method, and the one I am sticking with from here on. See below.
One last note on finishing. People in the US seem to want to make carnitas look like pulled pork, but the traditional texture is closer to burnt ends. The carniterias take large chunks of meat, crisped on the outside, and chop them. To get a similar bite at home, take those big chunks of meat out of your slow cooker, transfer to a large roasting pan so they all sit in a single layer, pour the slow cooker juices over the top, and roast until they achieve a nice mahogany brown. Chop roughly, add to your serving dish with any left over juice, and throw a touch of fleur de sel on top. That last part’s not from the carniterias, that’s from me. And you’re welcome.

Savory, citrusy, sweet and spicy.
Shit You Need
Boneless pork shoulder, also called Boston butt (…yeah, I know), 4-5 pounds
1 large onion, halved and cut in thick slices
5 cloves garlic, peeled and left whole
1 orange, quartered
2 bay leaves
1 cinnamon stick
2 Tbs kosher salt
4 Tbs brown sugar
1 1/2 tsp ground ancho chile
1 1/2 tsp ground chipotle chile
2 tsp smoked paprika
2 tsp dried oregano

Ready for the slow cook.
Keep Calm and justeffingcook
First things first: take off any string that your pork shoulder came tied with. Slice off the fat cap and reserve it. Break the shoulder down. First, along the planes the different muscle make, then into roughly 4-inch chunks. Along the way, feel free to remove and discard unsightly fat and stringy shit. If you have picky eaters, this will save you either work or headaches.
To your slow cooker, add the onions, garlic, and pork. Scatter salt, sugar, chiles, oregano and paprika over the pork. Squeeze each orange quarter over the pork, then toss the peel in after it. Add cinnamon stick and bay leaves. Add the big ‘ol chunk of fat you reserved to the pot.
Toss everything together with tongs or with clean hands to distribute the spices evenly.
Cook on low for 5 hours. (4-6 is the range. In my cooker, 5 hours is the sweet spot.)
Preheat your oven to 425F. When you’ve reached the end of the slow cooker cook, add the chunks of pork to a large roasting pan or a 9x13 inch Pyrex baking dish. Strain the juices remaining in the slow cooker and pour over the pork.
Roast in the oven for 30-40 minutes, aiming for mahogany-colored chunks of meat. There should be juice left in the bottom of your pan.
When cool enough to handle, roughly chop the pork into taco-appropriate-sized pieces, toss into a serving dish, and pour remaining juices over the top.
Serve with homemade corn tortillas, pico de gallo, queso fresco, and whatever fixins’ strike your fancy on the side.

Pimiento Cheese
Pimiento cheese is easy and quick and effing delicious. This version adds smoky and spicy to the descriptors thus achieving the total package.

My life can be broken down into two distinct epochs: BPC and APC. Before pimiento cheese and after pimiento cheese. After was a material improvement over the Before Times.
Pimiento cheese is easy and quick and effing delicious. This version adds smoky and spicy to the descriptors thus achieving the total package. It’s inspired by The Red Truck Bakery’s recipe, which in turn was handed down from the author’s Aunt Darla, who is evidently a genius.
So grab some cheese, raid the spice cabinet, pickle a few onions, and if you can find Duke’s mayo anywhere, buy it immediately. Find your favorite crackers and spread it thick. And while Ritz crackers are the traditional accompaniment, I love me some Wheat Thins.

Shit You Need
4 ounces cream cheese, softened
1/2 cup mayonnaise, preferably Duke’s
8 ounces grated cheddar cheese
4 ounces grated pepper jack cheese
1/4 teaspoon cayenne pepper
1 teaspoon smoked paprika
2 teaspoons crushed Calabrian chiles
1/4 cup quick-pickled onions, minced (see below)
1/2 cup roasted red peppers, chopped finely
2 tablespoons chopped fresh chives
Quick-pickled onions:
1/2 large red onion, thinly sliced
1/2 cup apple cider vinegar
1/2 cup hot water
2 teaspoons sugar
1 1/2 teaspoons kosher salt
Keep Calm and justeffingcook
Make the quick-pickled onions. Let them steep at least couple of hours before using.
Combine all the ingredients. I typically use my stand mixer. If you want to use a food processor, keep the grated cheese out until the very end. You want it chunky.
Let the mixture chill before using.
Spread on crackers and get comfortable. Hunker down and enjoy.


Roasted Vegetable Galettes
“I don’t know how to put this, but…I made my own puff pastry.”
You heard me right, folks. I made my own damn puff pastry. All it took was some planning, organization, half a day, and two pounds of butter. See? Anyone can do it.

I don’t know how to put this, but…I’m kind of a big deal.
This is possibly my favorite Ron Burgundy quote, and I say it regularly. In the last two weeks, however, I have been saying it daily. Often after creeping up on my husband in the bathroom or shaking him awake in the middle of the night. “I don’t know how to put this, but…I made my own puff pastry,” I say.
He shakes his head and/or grunts something unintelligible most of the time, but I know what he really means: “Wow, honey. You are incredible. I’m so glad I said yes when you asked me to marry you.”
Not above mixing my movie quotes, I have skills. Bow hunting skills, bass fishing skills, and puff pastry-making skills. Yes. Because I don’t know if you heard, but I made my own puff pastry pastry.
And all it took was some planning, organization, half a day, and two pounds of butter. See? Anyone can do it.
And you should too, if you have some time to kill and the need for butter-soft hands. Otherwise, grab some Dufour from the freezer section and you’re good to go with any recipe that calls for puff pastry, such as the one below.
But before we get to the recipe, let me prevaricate a bit. I was not expecting my first experience with puff pastry to go well. I was expecting disappointment, like when the British Bake Off contestants stare into their ovens and wail, “I don’t know what happened! It never melted/burned/refused to rise or solidify in practice!!!”
But I was not disappointed. This puff pastry did as the name implied: it puffed. It also crisped, burst into shards of buttery decadence in my mouth, and was utterly delicious. And now…I’m kind of a big deal.
I made puff pastry as a learning experience. And then stood there with five pounds of puff pastry on my hands realizing I hadn’t really thought this through. What the hell to do with it all? Aside from tarte tatin, which is most definitely in my future. And while I do not doubt my ability to eat five pounds of puff pastry all in tatin form, I also needed to make dinner.
Long story short: roasted vegetable galettes. All from things I already had in my produce drawer.

The toppings - roasted tomato with feta, and roasted peppers and onions with baked eggs - were inspired by Yotam Ottolenghi’s… entire body of work, basically.
I often stand in front of my refrigerator and ask myself what Y.O. would make for dinner with what I have. Half the time, the answer is roasted tomatoes served hot over cold salted yogurt with lemon zest, as it is freaking delicious. And while that served as inspiration for one variant, the other came from his cookbook Jerusalem, where he was kind enough to spell out the solution to my puff pastry dinner dilemma.
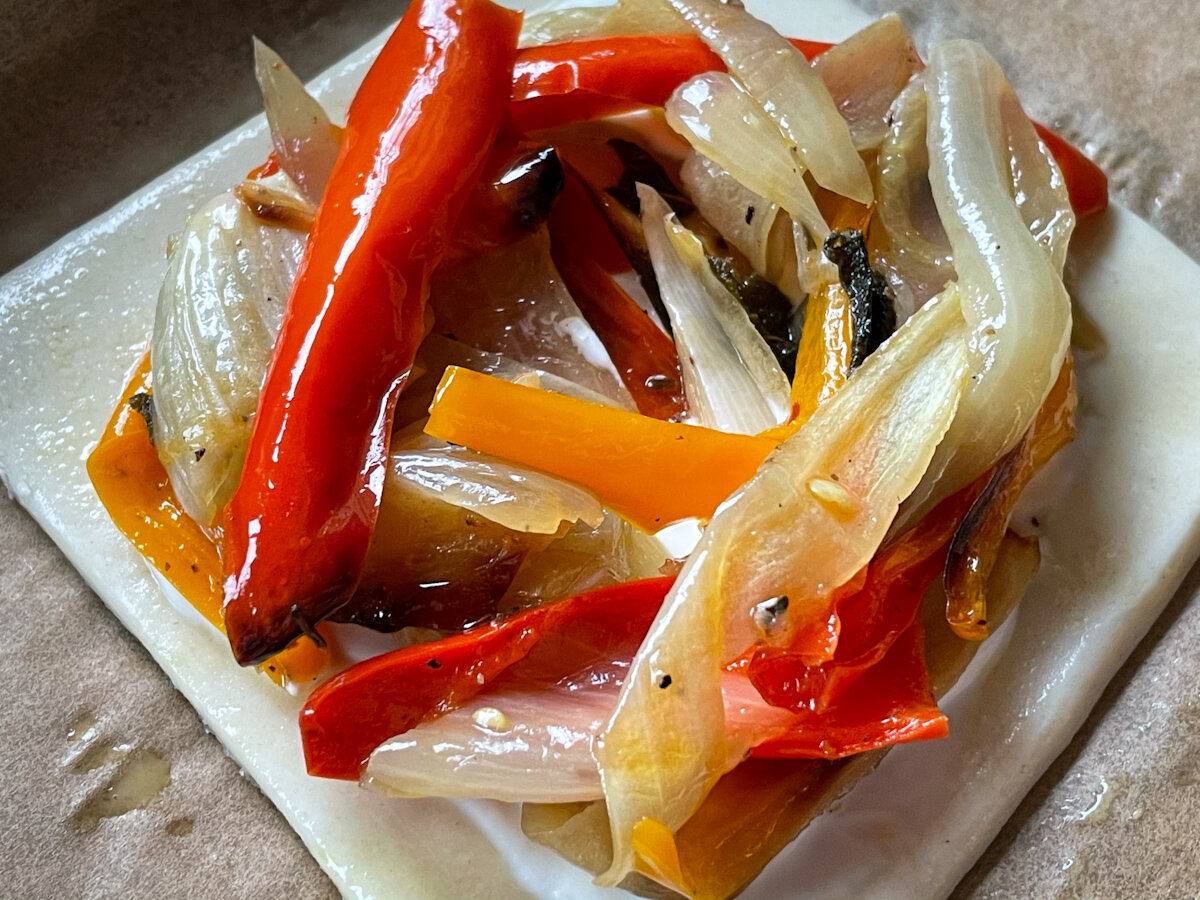
In my version, I roasted onions and red peppers, tossing in some fresh sage I happened to have on hand. (It’s been in the produce drawer for nearly a month, and still fresh as a daisy! Who knew?) This paired with the eggs on half my galettes. For the rest of the galettes, I roasted tomatoes with z’atar and topped them with feta.
I paired these with a simple green salad, called it Dinner, and there was much rejoicing in all the land.
For drink pairings, I recommend either three fingers of Glenlivet, or a Manhattan… after you kick the vermouth in the side with a pair of steel-toed boots.
Enjoy.

Makes 6 galettes: 3 roasted tomato and 3 roasted pepper
Shit You Need
Puff pastry, 14 ounces (if frozen, thaw overnight in the refrigerator)
One egg whisked with 2 teaspoons water, for egg wash
Roasted Pepper Galettes with Baked Eggs
2 tablespoons creme fraiche or sour cream
one onion, cut in half lengthwise and then into 1/2 inch wedges
one red pepper, sliced into 1/2 inch thick strips
fresh sage, one sprig
olive oil
kosher salt
freshly ground pepper
3 eggs

Roasted Tomato and Feta Galettes
cherry tomatoes, 12 ounces
fresh oregano, 3 sprigs
olive oil
1 tablespoon z’atar seasoning
feta cheese

Keep Calm and justeffingcook
Prepare the roasted vegetables
Preheat the oven to 400 degrees Fahrenheit.
In one oven-safe baking dish, toss onions and peppers with sage sprig and a generous amount (2 or 3 Tbs) of olive oil. Season with a few pinches of salt and a few generous grinds of pepper.
In another baking dish, toss tomatoes with 2 or 3 Tbs of olive oil, two sprigs of fresh oregano (reserve the last sprig for later), the z’atar spice mix, and additional salt, to taste. Some z’atar mixes contain salt, other’s don’t. Or you can make your own z’atar by tossing together sesame seeds, thyme, and ground sumac.
We have grown to love z’atar in our household. I use it as a spice mix to roast chicken, veggies, or give anything a little Middle Eastern kick.
Roast the peppers and onions, tossing occasionally, until softened and they are beginning to caramelize, about 35 minutes. At the same time, roast the tomatoes, tossing occasionally, until they burst, lose some of their liquid, and begin to darken. This takes a little longer than the peppers and onions. Or you can do what I do, and once you take the peppers out of the oven, turn on the broiler and hit the tomatoes with that for 5 minutes or so.
While the vegetables are roasting, roll out puff pastry until it is a 1/8 inch thick rectangle. Cut in half lengthwise, and then cut each strip into thirds. Space the puff pastry on a parchment-lined baking sheet and refrigerate 30 minutes.
Once the vegetables are ready, discard the herb sprigs and set the vegetables aside to cool until you are ready to use them.
Assemble galettes
Turn the oven up to 425 Fahrenheit.
Remove puff pastry from oven and brush the tops with the egg wash.
Top half of the pastry squares with sour cream/creme fraiche, leaving a 1/4 inch border to allow the pastry to puff.
To the sour cream-topped pastry, add the pepper mixture in a somewhat even layer, leaving that quarter-inch border. Make a slight hollow in the center. (There will be leftover peppers and onions)
To the remaining pastry squares, add tomatoes in an even layer, leaving - you guessed it - a 1/4 inch border. Crumble feta generously over the top, reserving about half.
Bake the galettes for 14 minutes. Remove from oven and add one egg to the center of each pepper-topped galette. Return to the oven and bake all until the egg whites are set and opaque but the yolks still runny, about another 10 minutes. In my oven, it took 12 minutes, but it’s cool like that. 😎
Sprinkle the tomato galettes with the remaining feta and sprinkle reserved fresh oregano leaves over the top. If you have a bit more fresh sage, garnish the egg and pepper galettes with some small (or chopped) leaves.
Drizzle olive oil over each galette and serve.


Bulgogi Bowl
Why does this dish inspire obsessive behavior? Because it is packed with amazing flavor, is super easy to make, and it all cooks in the amount of time it takes to steam the rice. Perfect weeknight dinner material.

Bulgogi goes bibimbap.
Certain people who will remain nameless (but her name rhymes with McCall) have been bugging me about it putting this recipe on the blog. I finally got tired of the light stalking and the drunk 2 am texts, so here you go, “anonymous stalker”.
Why does this dish inspire obsessive behavior? Because it is packed with amazing flavor, is super easy to make, and it all cooks in the amount of time it takes to steam the rice. Perfect weeknight dinner material.
I honestly can’t remember if this dish came about because of our family’s love of rice bowl dinners, or if our love of rice bowls was inspired by this dish. Sort of a chicken/egg scenario.
And speaking of egg, many of our rice bowls wind up with an egg on top. It’s very nearly a family motto. Put an egg on it!
When you start with rice and add a little savory protein and a bunch of herbs, dinner can go a number of different directions. Kimchi, seaweed, leftover veggies and a fried egg, and it bends toward Korean bibimbap. Fish, avocado, maybe some mango, and we’ve got Hawaiian poke. But regardless of the direction we take it, dinner is always quick, balanced, comforting, and delicious.
For this version, our favorite topping is a variation on another Korean dish: bulgogi. Bulgogi is typically made by grilling beef marinated in a sauce of sugar, soy sauce and sesame oil, and is completely, utterly, effing delicious. Somehow more than the sum of its parts. Possibly, it’s witchcraft.
The recipe that follows uses that sauce with ground beef, and a huge amount of the holy flavor trinity of garlic, ginger and scallions. One might even say a shit load…if one were inclined toward a bit of gentle profanity. Which as you know, I am.

With those aromatics, plus brown sugar, soy and sesame, it’s a flavor party in your mouth and everyone’s invited. Not just beef, but any protein that takes a shine to a little sauté. Pork? Hard yes. Veal? Yup. Ground chicken? Sure. Tofu? Definitely. Minced flip flop? …Yeah, probably.
You’re welcome, McCall.
Makes enough for two adults and 2 hungry teenagers.
Shit You Need
2 pounds ground beef
1/2 cup packed brown sugar
1/2 cup low-sodium soy sauce (low-sodium is key, else you will need to chase dinner with a gallon of water)
1 heaping tablespoon gochugaru (Korean chile flake) or chile flake of choice, adjusted for spiciness
5 good-sized cloves of garlic, minced (close to 1/4 cup when you’re finished)
2 inches of ginger root, peeled, cut into slices, crushed and minced (close to 1/4 cup when you’re finished)
1 bunch scallions, chopped, white and green parts separated
2 tablespoons toasted sesame oil
2 tablespoons sesame seeds
1/2 bunch cilantro, chopped

Equal parts ginger, garlic, and scallion whites.
Keep Calm and justeffingcook
In a large sauté pan over medium heat, toast the sesame seeds until golden brown. Set aside.
Turn the heat to medium-high and add ground beef to the sauté pan. Cook until any fat has fully rendered and the beef begins to brown. Note: if you are using tofu or chicken, add oil to the pan and let it heat first, then toss in your protein and let it sizzle.
Meanwhile, add sugar and soy to a small bowl and whisk in the chile flakes. Set aside.
Once the beef has fully browned, check the level of fat in the pan. If there’s more than a tablespoon or so, drain the excess or dab it away with a paper towel.
Add ginger, garlic, and scallion whites and toss over medium heat until the aromatics are softened, about 3 minutes.
Add sesame oil and toss well. Your kitchen should now smell amazing.
Give the soy mixture one last whisk and add it to the skillet. Toss well to coat everything. I bet you thought your house couldn’t smell any better than it did a second ago. You were wrong.
Turn up the heat a bit to allow the liquid to come to a boil, then turn the heat back down to medium and allow the sauce to reduce.
Once the sauce is the consistency of syrup, take the skillet off the heat. Add the toasted sesame seeds along with 3/4 of the scallion greens and cilantro. Toss well.
Serve over rice, quinoa, or cooked grain of your choice. Garnish with the extra cilantro and scallion greens.
Bonus points if you put an egg on it.

Put an egg on it!