
Twenty Year Apple Pie
I've been aiming for apple pie perfection for 20 years. Not just the occasional glorious pie but consistent, knock it out of the park, perfect crust, zero drippy fillings no matter what apples or pie dish or phase of the moon, mouth-watering, covetable pie-fection.

It's fucking apple season, motherfuckers.
I have lived in Minnesota for the past twenty-five years, and I can say with great authority that there are one or two pretty significant downsides to choosing a life this far north.
Winter, for instance.
Sure, Christmas is pretty. But by the time February rolls around and you haven't seen the sun in 40 days your shoulders are spasming from the constant shivering, you're pretty much over it.
It stops being pretty. The snow is now the color of dirt and half the grocery store parking lot is taken up by a mountain that looks suspiciously like a gigantic poop emoji which you'll be stuck with until Memorial Day.
Once, on a winter yoga retreat, I went out for wine during a snowstorm and almost didn't make it back with all my fingers and toes. My car got stuck in a snowdrift on a dark country road and I sat there for an hour with the car running on fumes and me in yoga pants and fucking backless clogs hoping someone might come along. They eventually did, but not before I got out and, standing ass-deep in snow, attempted to dig the tires out of the snowbank with a shoe.
So yeah, some downsides.
But those downsides are very nearly matched by the upsides of the apple season. No place outside of Eden can match the luscious glory of the Minnesota apple. Minnesota apples are fucking magic.
And apple pie is the best career to which an apple can aspire.
I've been aiming for apple pie perfection for 20 years. Not just the occasional glorious pie but consistent, knock it out of the park, perfect crust, zero drippy fillings no matter what apples or pie dish or phase of the moon, mouth-watering, covetable pie-fection.
And if you are a math whiz like me, you know that 20 years of apple pie = pi raised to the 20th power. Which is 8,681,463,856. Which is a very big number.
The components of a good pie are the crust and the filling. Obvious, sure, but they bear discussing separately.
For a double crust fruit pie, one needs flaky pie crust. You achieve flakiness by having minimal gluten formation and layers of butter between layers of flour. Butter contains water, which steams as the pie bakes, creating the layers that become flakes.
Let us bypass all the bullshit of vodka, vinegar, and all other additives that purport to help you achieve perfect flakiness. Let's go right to technique:
Do not overwork the dough, especially after liquid has been added to the flour
Laminate your crust
WTF does it mean to laminate the crust? Lamination is the process of rolling and folding the dough to bring it together, creating thin sheets of butter within the dough, rather than chunks of butter. This equals layer after layer of brittle flakes that explode on impact, becoming a buttery, appley ticker-tape parade of flavor on your tongue.
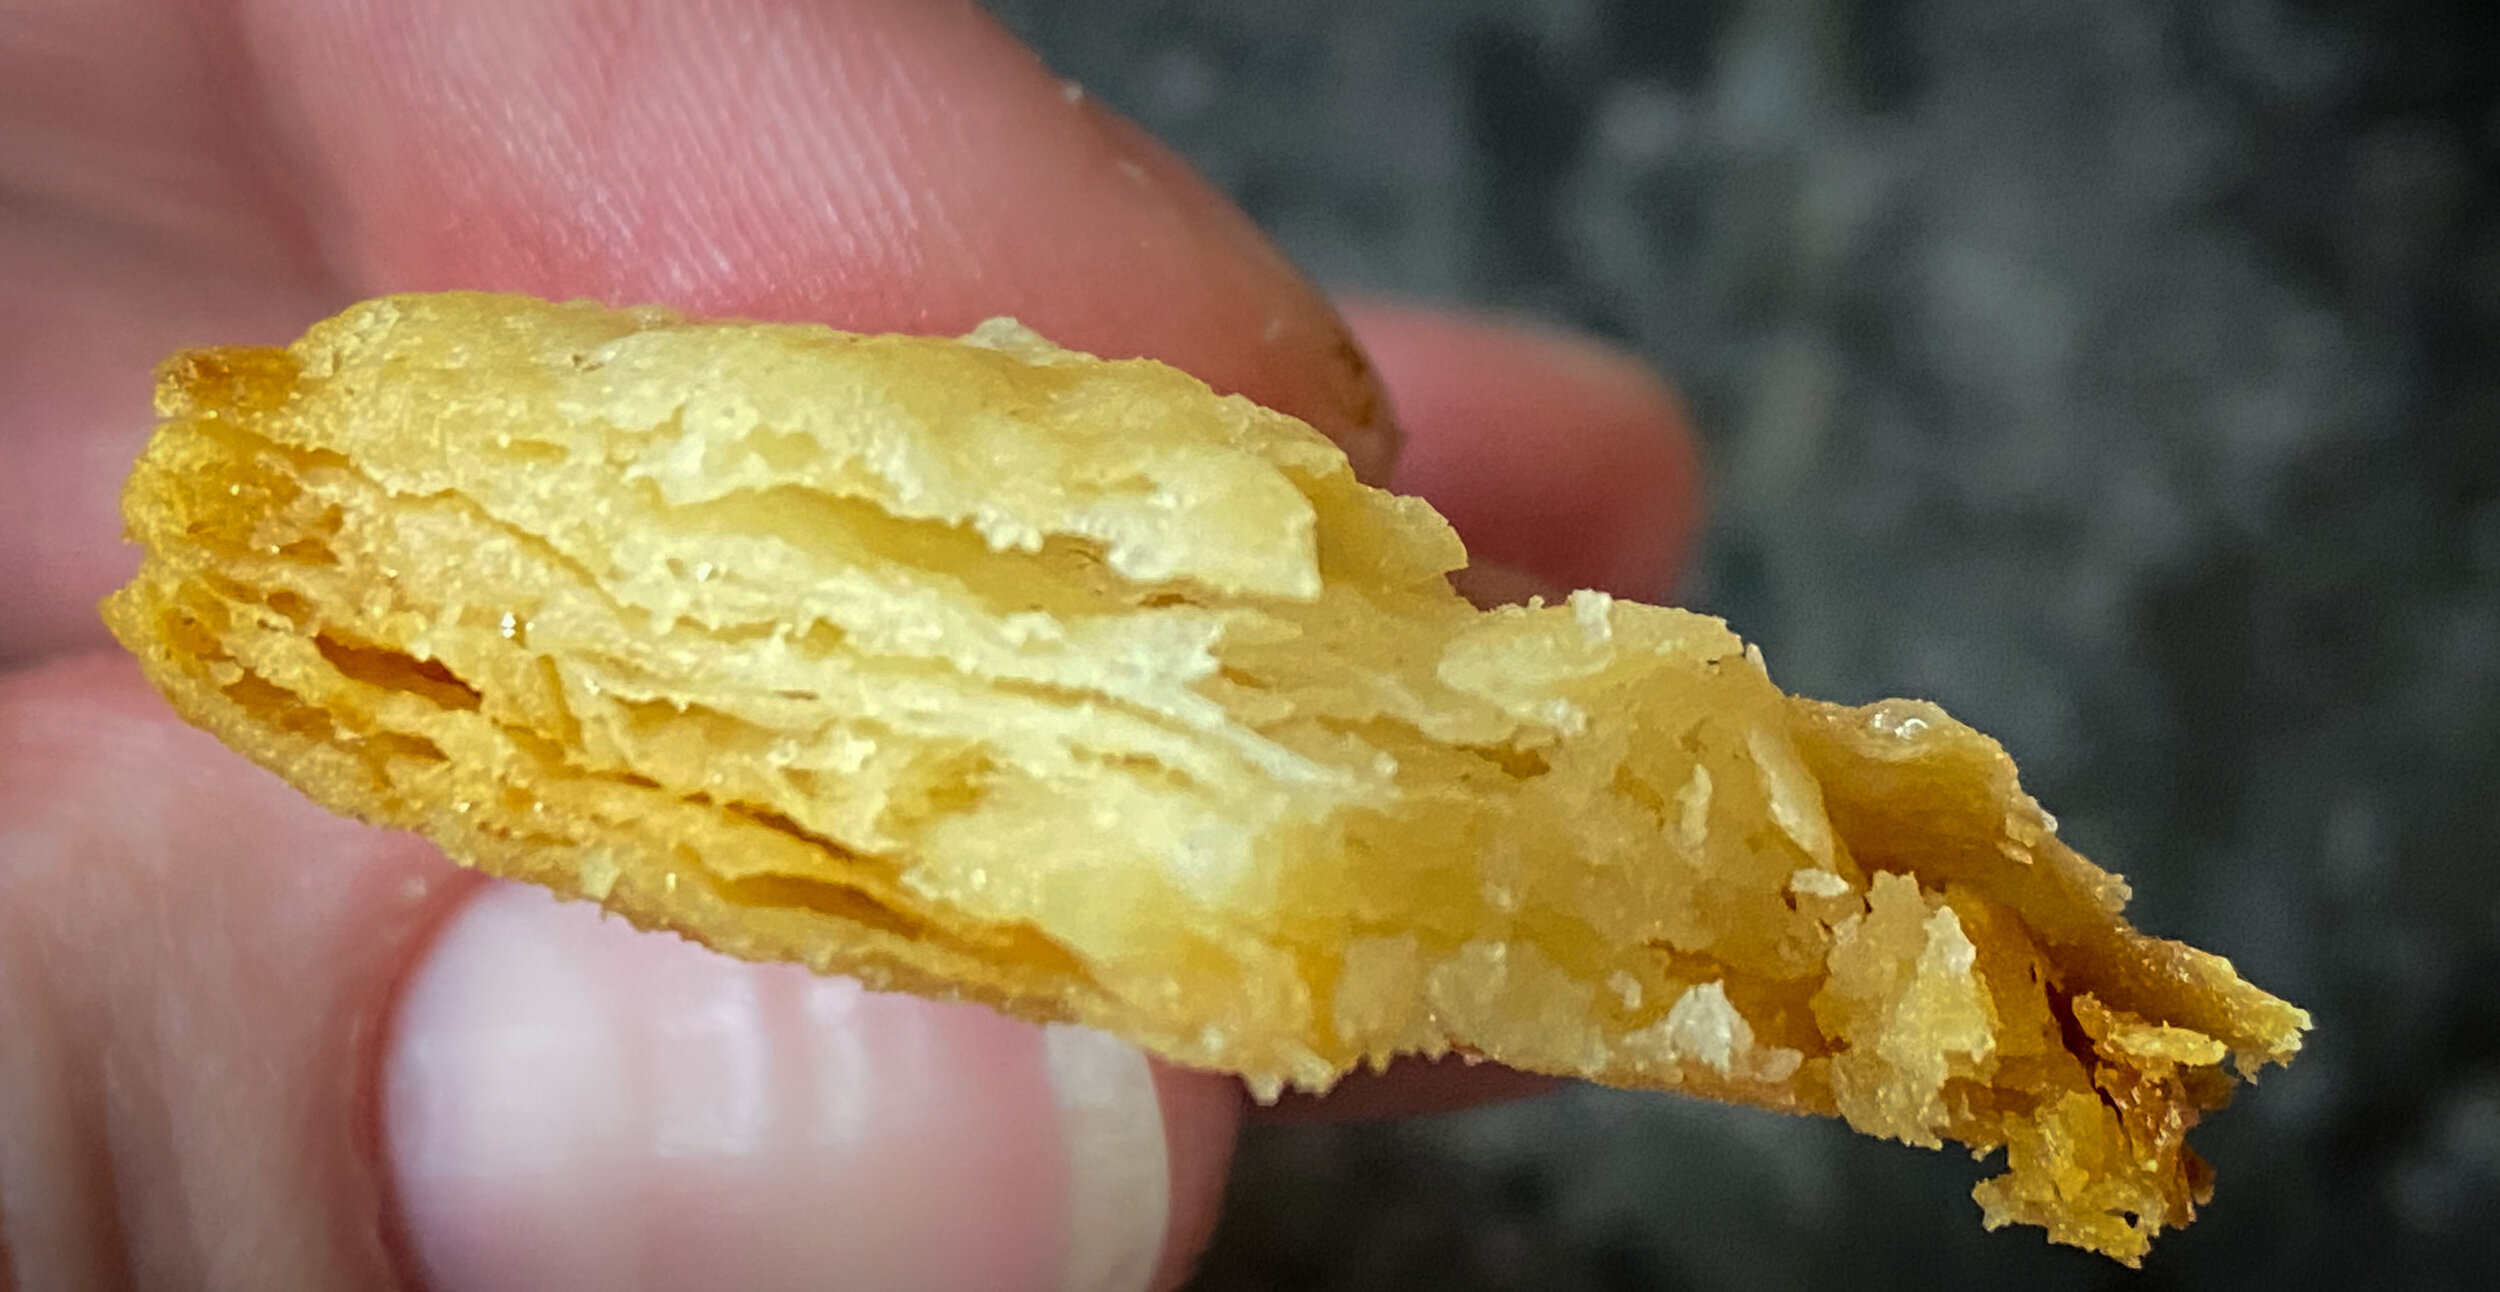
Pie crust perfection. It only took 20 years. Whatever.
Lamination legit changed my life.
Now for the filling. I want crisp-tender apples in a matrix of gently thickened apple juice. Not crunchy apples. Not apple pudding. Not runny juice fucking up my bottom crust. To achieve this magic, one must use some sort of thickener, the most common being flour or cornstarch.
I don't like using flour. You need to use a lot in order for it to work as a thickener, and I don't like the slight grittiness it leaves in the filling. I prefer the texture of a filling made with cornstarch, but cornstarch comes with one huge drawback. If the filling does not boil - all the way to the center - that shit won’t thicken. A relatively small or thin pie will come up to temperature in the center pretty quickly. Not so for a 10 inch deep dish pie. In order for the center of the filling to boil you'll have to cook it long enough that either your crust will overbrown, or the apples will overcook, or both.
One solution, or course, is to bake a smaller (or thinner) pie.
Fuck that.
My solution is to make science work for me, rather than against me. I give the apples and their juices a quick shot of heat on the stovetop before piling all that lusciousness into a crust for the final bake.
Downside: one more pan to wash. Upside: 1. Apples tossed in browned butter, motherfuckers! 2. Perfect filling no matter the kind of apples, no matter how many.
That means consistency. No more holding your breath, palms all sweaty as you cut that first slice after Thanksgiving dinner thinking, "Shit. Maybe the apples were too juicy this year. Did I add enough cornstarch? Am I going to look like some B-list chump?"
Nope. You slice that shit and lever it onto a plate smiling the whole time, never once breaking the gaze of your mother-in-law or boss or smart ass neighbor. As they ooh and ahh, you just shrug and say, "Oh, this old thing? I just threw it together."
But you’re really thinking, “Welcome to fucking apple season, motherfuckers.”

Shit You Need
Pie crust:
13 ounces all-purpose flour
1 teaspoon kosher salt
1 tablespoon sugar
12 tablespoons (1 1/2 sticks) very cold unsalted butter, cut into 1/2 inch pieces
1/3 cup very cold vegetable shortening, cut into pieces
1/2 cup ice water.
I add a few handfuls of ice to a 2 cup pyrex measuring glass, give it a good stir, and set it aside as I throw the rest of the crust together. Once I am ready, I measure 1/2 cup in a 1 cup measuring glass, then add it to the rest of the ingredients.
Filling:
About 8 apples, peeled, cored and sliced into quarters, then each quarter sliced into thirds - or halves if they are small apples. You are aiming for 2 1/2 pounds of apples slices when all is said and done.
Let’s take a moment to talk about apple choices. My sweet spot (haha, see what I did there) is a combination of mostly one sweet/tart/firm/juicy variety like Honeycrisp, Sweetango, First Kiss (Rave), Haralson, or Zestar. To these I add one small granny smith apple (for pectin) and one golden delicious. That golden delicious will break down and add an applesaucey matrix around the other apples.
5-6 ounces sugar, depending on the sweetness of the apples
Pro tip: taste the apples
1 1/2 tsp cinnamon
1/4 tsp freshly grated nutmeg
1 1/2 ounces cornstarch (about 3 generous tablespoons)
3 tablespoons unsalted butter
A few tablespoons of milk, to brush to top of the pie
Extra sugar mixed with a bit of cinnamon, for dusting.

First kiss (Rave) apples, one Golden Delicious, and one Granny Smith.
Keep Calm and justeffingcook
Pie crust:
Position a rack in the upper 1/3 of the oven and preheat to 425 degrees Fahrenheit.
Add the flour, salt, and sugar to a large mixing bowl and whisk together.
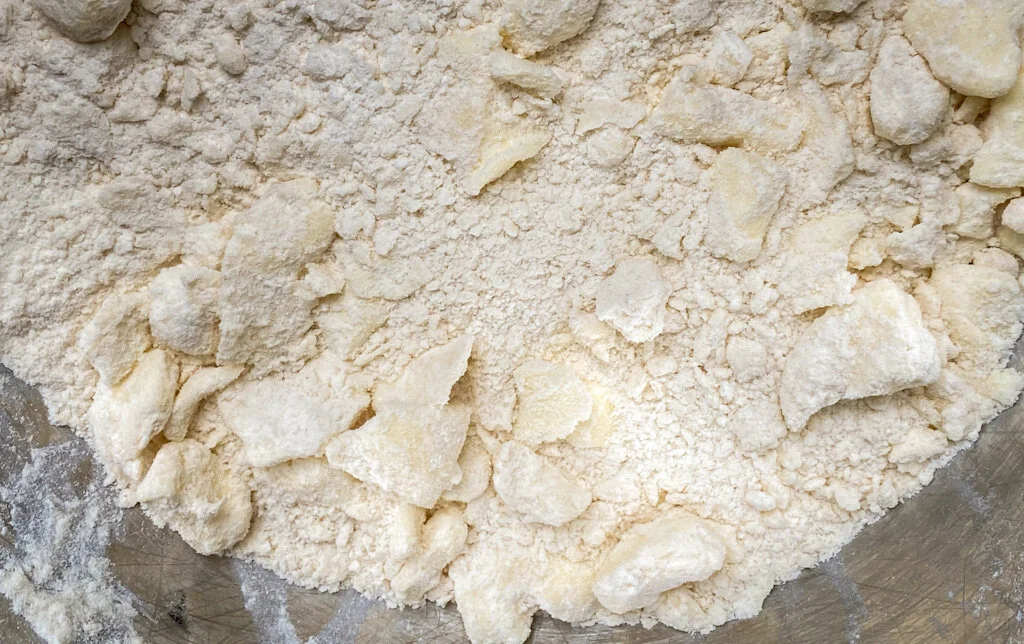
Working quickly with your fingers, cut the shortening into the flour mixture until it looks like coarse sand.
Add the sliced butter and again, using your fingers, smush the pieces flat. Some pieces will break, others will flake. It’s fine. Don’t overdo it.
Make a well in the center and pour in the ice water. Yep, I do it all at once, and the whole thing. Because I know it’s going to work, that’s why.
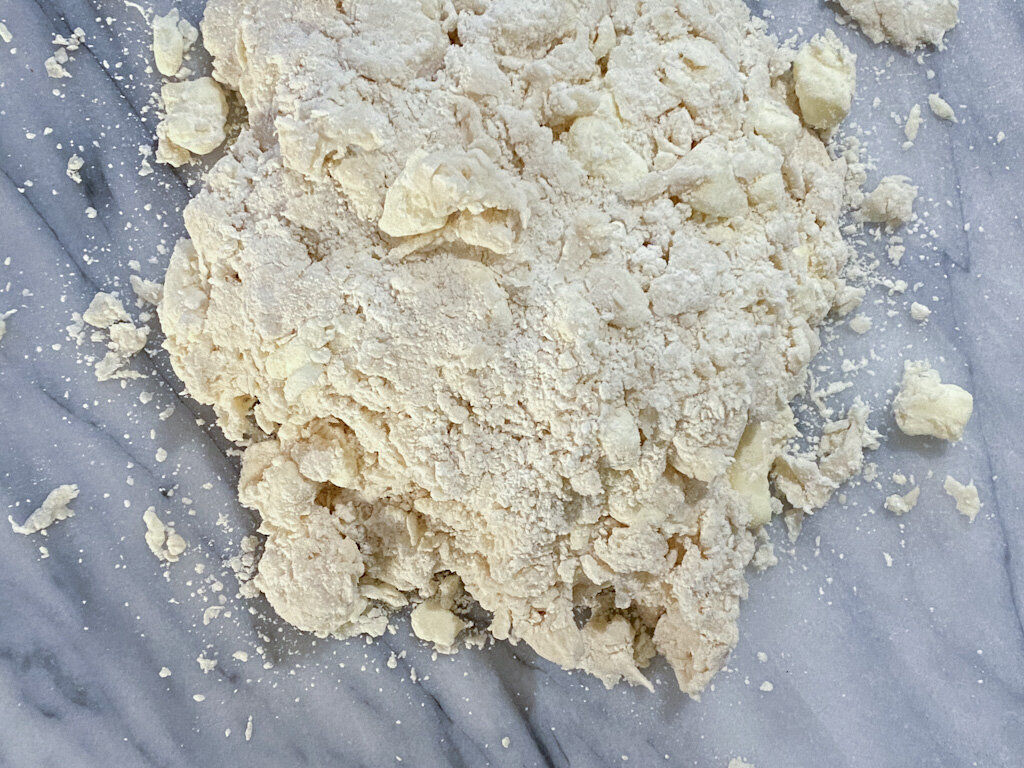
Still using your fingers, toss the water in with the flour mixture, scooping along the bottom a bit to get the finer bits of flour. Once it starts to haold together a little, you’re done.
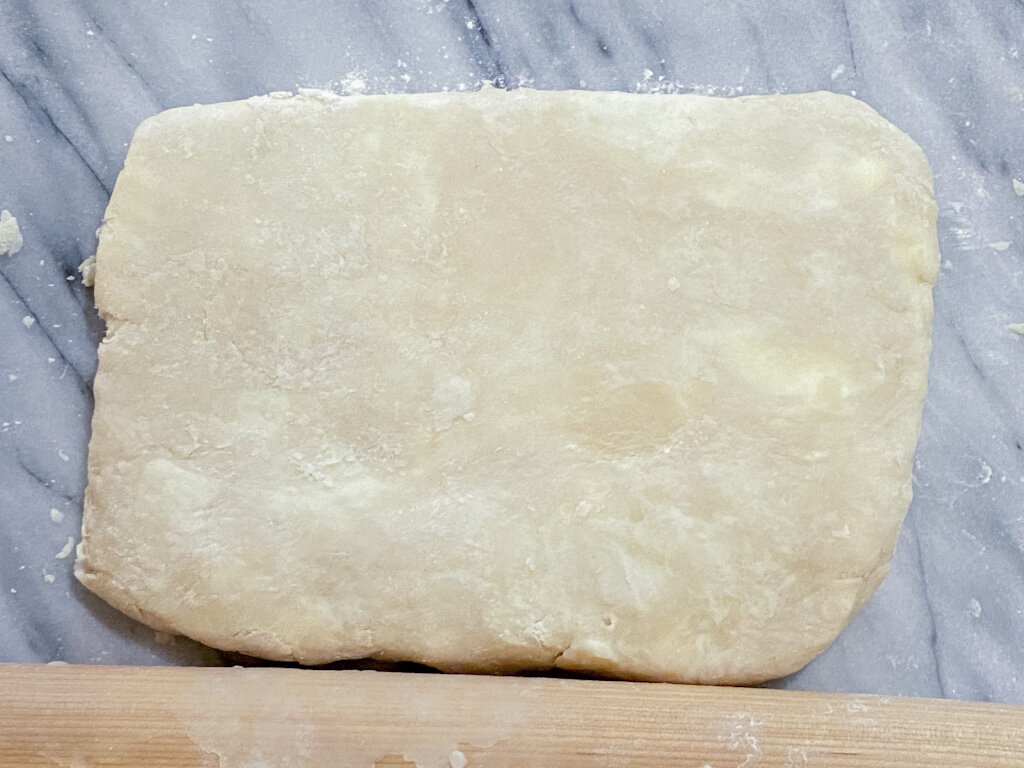
Dump the flour mixture onto a lightly-floured rolling surface, Using a dough scraper, corral all the bits the best you can. With a floured rolling pin, roll that mess in into a vague rectangle.
Using the dough scraper, lift up one short end and fold it to the other side. Corral the strays, get butter bits off the rolling pin and re-flour it, and roll the folded dough into a slightly less messy rectangle.
Repeat until the dough holds together and you’ve completed four or five folds. Cut the dough in half, make two rough disks, wrap in plastic wrap, and refrigerate at least an hour, or up to a day.

Filling:
Add all the apple slices to a large mixing bowl.
To a smaller bowl, add the sugar, spices and cornstarch and whisk together.
Add the sugar mixture to the apples and mix well. Let them sit, mixing occasionally over the next 15-20 minutes, until the apples have released some juice and they are now coated in a runny, sugary mess.
While the apples sit, add the butter to a large skillet or dutch oven and heat over medium high heat, swirling as the butter foams. Turn down the heat as needed so that the butter doesn’t burn but rather turns golden brown and smells nutty and awesome.
Add the apple mixture and turn the heat to high or medium high, aiming for the juices to bubble and thicken before the apples cook much at all. This should only take 2 or 3 minutes. Set aside and let cool to room temperature.
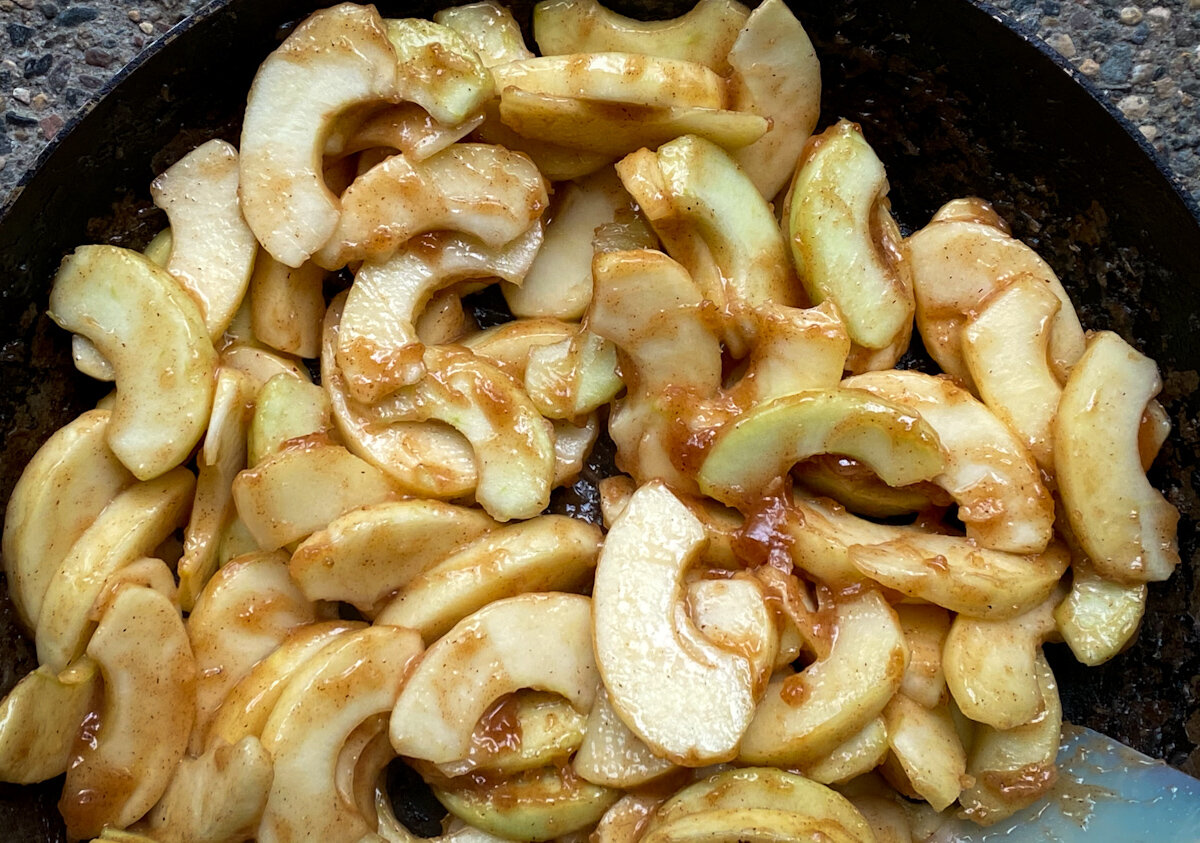
After tossing the apples, sugar, spices and cornstarch in browned butter, the house smells exactly like a hug feels.
Assembly:
Roll out the larger of the two disks of dough to 1/8 inch thick. Tease up an edge, roll it onto your rolling pin, transfer to the pie plate and unroll. Gently ease the dough into the pie plate without stretching it.
Leaving 1/4 to 1/2 inch overhang, cut off excess dough.
Top with the apple filling. If your pie plate is like mine, it will be slightly mounded above the rim toward the center.
Roll out the other crust to 1/8 inch thick and using the same method, release it onto the top of the pie. Leave 1/2 inch overhang and cut off excess. Fold the two edges over one another and crimp decoratively.
Cut slits in the top of the pie crust to allow steam to escape.
Using a pastry brush, dab the top crust with a little milk.
Dust with cinnamon sugar.
Bake at 425 degrees for 15 minutes.
Turn the oven down to 350 and bake for 30 minutes more. Keep an eye on the crust to be sure it’s staying in golden territory, rather than going full charcoal. If you see danger looming, cover the offending pie parts with aluminum foil.
Let cool before slicing. A little warm is okay - you should be able to rest the pie plate comfortably on your palm.
Serve with the ice cream of your choice, and with pride.

Awaiting the top crust.

Next, brush the top with a bit of milk, and sprinkle with cinnamon sugar.

Begging for some ice cream. Vanilla, caramel, and cinnamon are all good bets.
Bomb-ass Jambalaya
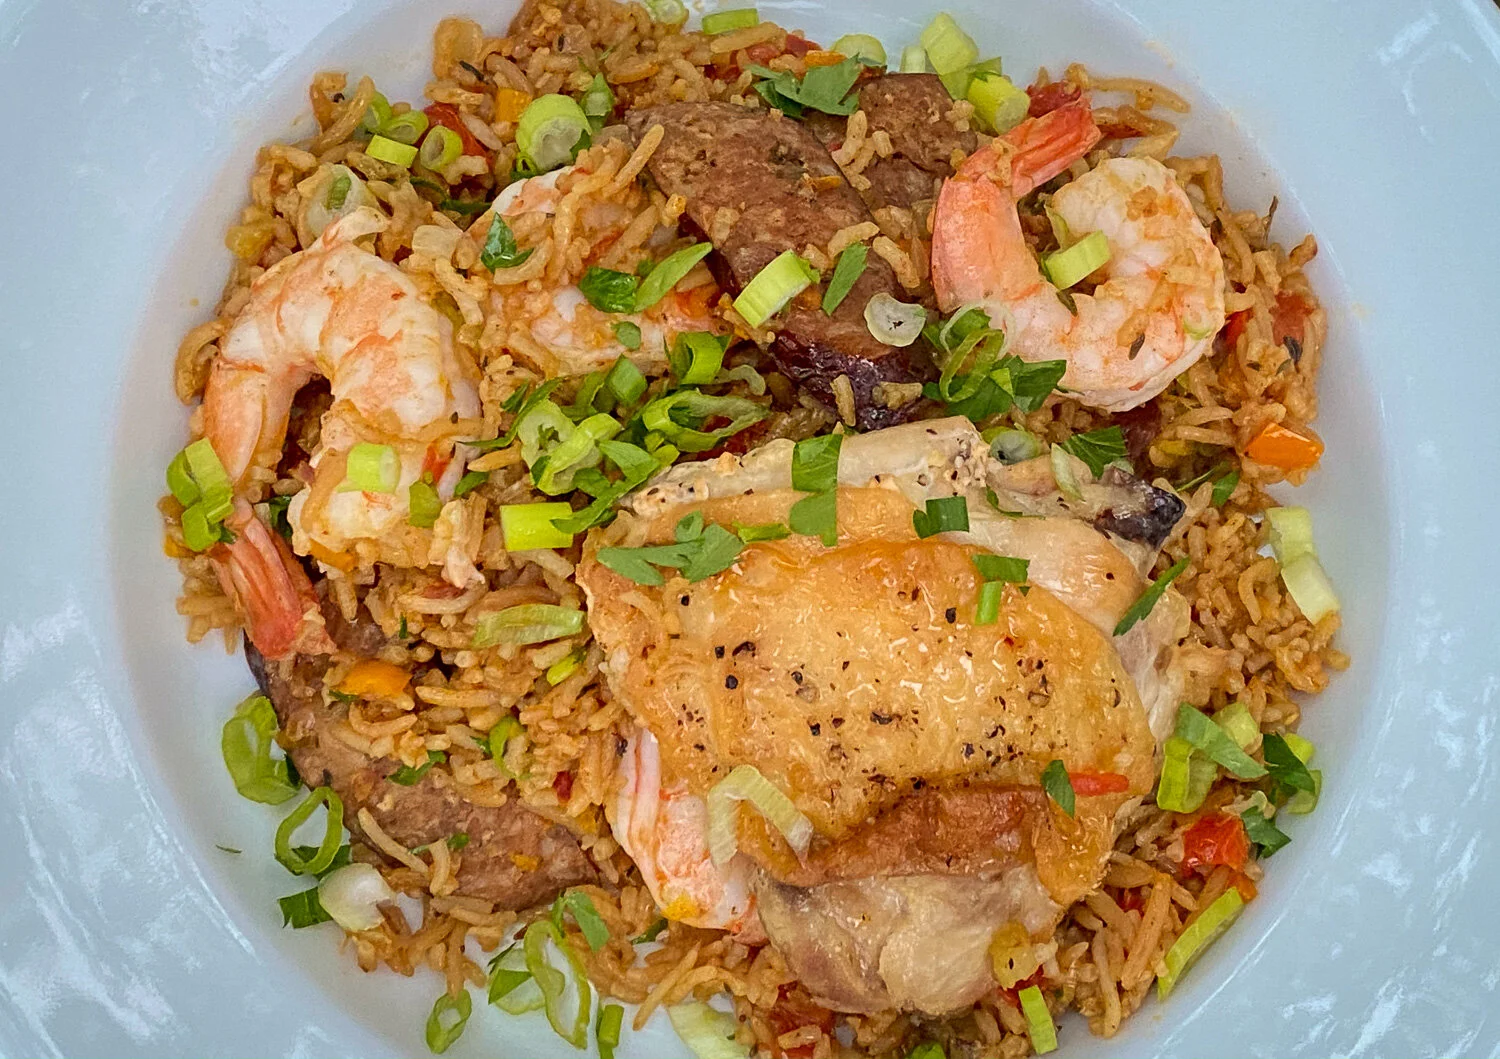
I wanted my rice to tumble off my fork on the way to my mouth, studded with jewel-like bits of tomato and green onion and glistening with spicy, unctuous oils. Fucking flavor confetti. Mardi Gras in your mouth, but without the beads and drunk tourists. This was the jambalaya I needed in my life.

I finally cracked the Jambalaya code! Way more satisfying than the Davinci one.
One-pot rice dishes can easily suffer from texture issues - such as layers of concrete on the bottom of the pot and gummy-textured rice. Every previous version of my jambalaya tasted great (sausage, shrimp, spice…duh) but the rice was always mushier than I wanted.
I adjusted the amount of water I was using, tried finishing the rice in the oven instead of on the stovetop. Better, but not enough.
I wanted my rice to tumble off my fork on the way to my mouth, studded with jewel-like bits of tomato and green onion and glistening with spicy, unctuous oils. Fucking flavor confetti. Mardi Gras in your mouth, but without the beads and drunk tourists. This was the jambalaya I needed in my life.
My personal #jambalayagoals.

Those pretty, pretty colors.
So I borrowed some techniques from other recipes - like cooking the chicken and sausage first to brown everything and get it all Maillardy*, and toasting the rice in oil before adding the liquid. The oven finish of the rice was a keeper, so I kept it.
And you know what? Flavor confetti. Mardi Gras in my mouth. Bomb-ass, blessed-by-God jambalaya. I went back for seconds. And then I went back for thirds.
And now I will always cook my Jambalaya like this. Forever and ever, amen.
Yes, there are more steps, which is why I jammed it in the Worth the Work category. But it’s still a one pot meal, and still pretty damn easy. No extra dishes and totally worth the few extra minutes you’ll spend browning things separately.
Make it immediately. Thank me later.
*The Maillard reaction is the process by which heat alters amino acids, browning your food and making it considerably more delicious.

Ready to top with chicken and pop in the oven.
Shit You Need
4 bone-in, skin-on chicken thighs
Kosher salt and freshly ground black pepper
12 ounces andouille sausage, sliced diagonally into 1/4 inch ovals
one large onion, diced
one large red bell pepper, diced
3 stalks celery, diced
5 cloves garlic, minced
1 bunch scallions, chopped, white and green parts separated
2 cups long-grain rice
1 tablespoon dried thyme
1 1/2 tablespoons paprika (I used paprika flakes - it was super FUN!)
1/2 teaspoon freshly ground black pepper, plus more, to taste
1/2 teaspoon cayenne
1 teaspoon crushed Calabrian chiles in oil (Optional, sorta…they add complexity to the heat.)
3 1/2 cups chicken stock
1 pound of cherry tomatoes, cut in quarters. If you can find fresh San Marzano tomatoes, even better.
1 pound shrimp (26-30 count tail-on is my preference, but feel free to use what you like)
1/4 cup fresh parsley, chopped

Right before oven time.

After 45 minutes in the oven, the stock is fully absorbed. Set the chicken aside and give the shrimp 5-8 minutes to cook with the rice.
Keep Calm and justeffingcook
Preheat oven to 350 degrees Fahrenheit. Position the racks in the bottom third of the oven.
Salt and pepper the chicken thighs (about a teaspoon of salt and 4 or five cranks of pepper per piece).
Add a tablespoon or two of olive oil to a good size stockpot or dutch oven (one with a lid - you don’t need it now, but you will later) and heat over a medium flame. Add the chicken thighs, skin-side down. Adjust the flame toward medium-low as needed so the skin renders and browns over about 15-20 minutes.
Pull the chicken from the pot and set aside.
Toss in the andouille sausage, turn the heat to medium-high, and cook until well-browned. Set aside.
You now have a gorgeous layer of chicken and sausage fat in the bottom of your pot. Add the rice and toss it well. It will turn translucent, and then the starches on the outside will start falling off and coating the bottom and sides of the pot, browning. This is where all the good shit starts to happen.
Add the paprika, cayenne, and thyme. Toss to coat in oil.
Add the onion, bell pepper, celery, garlic, and white part of scallions and let them sweat, pulling all the yummy brown stuff from the pan.
Add the chicken stock, sausage and tomatoes. Bring to a boil, then turn off the heat. Place the chicken thighs on top, skin side up, cover the pot, and place in the oven for 45 minutes.
Set aside the chicken thighs. Add the shrimp to the pot, burying them in the rice a bit, and return the pot to the oven for 5 minutes.
Remove from oven and stir in most of the scallion greens and parsley. Place the mixture in your serving dish, top with the chicken thighs, and a last sprinkle of parsley and green onions.
Have seconds.
Have thirds.
Sit down and compose a thoughtful comment on this blog post. Tell me how it worked out for you. Success or fail? Yay or Nay? Bomb-ass or dumpster fire? Gimme the dirt, baby!


Goat Cheese Epazote Tamales
I know what you’re thinking: What the fuck is epazote?
I’m glad you asked.
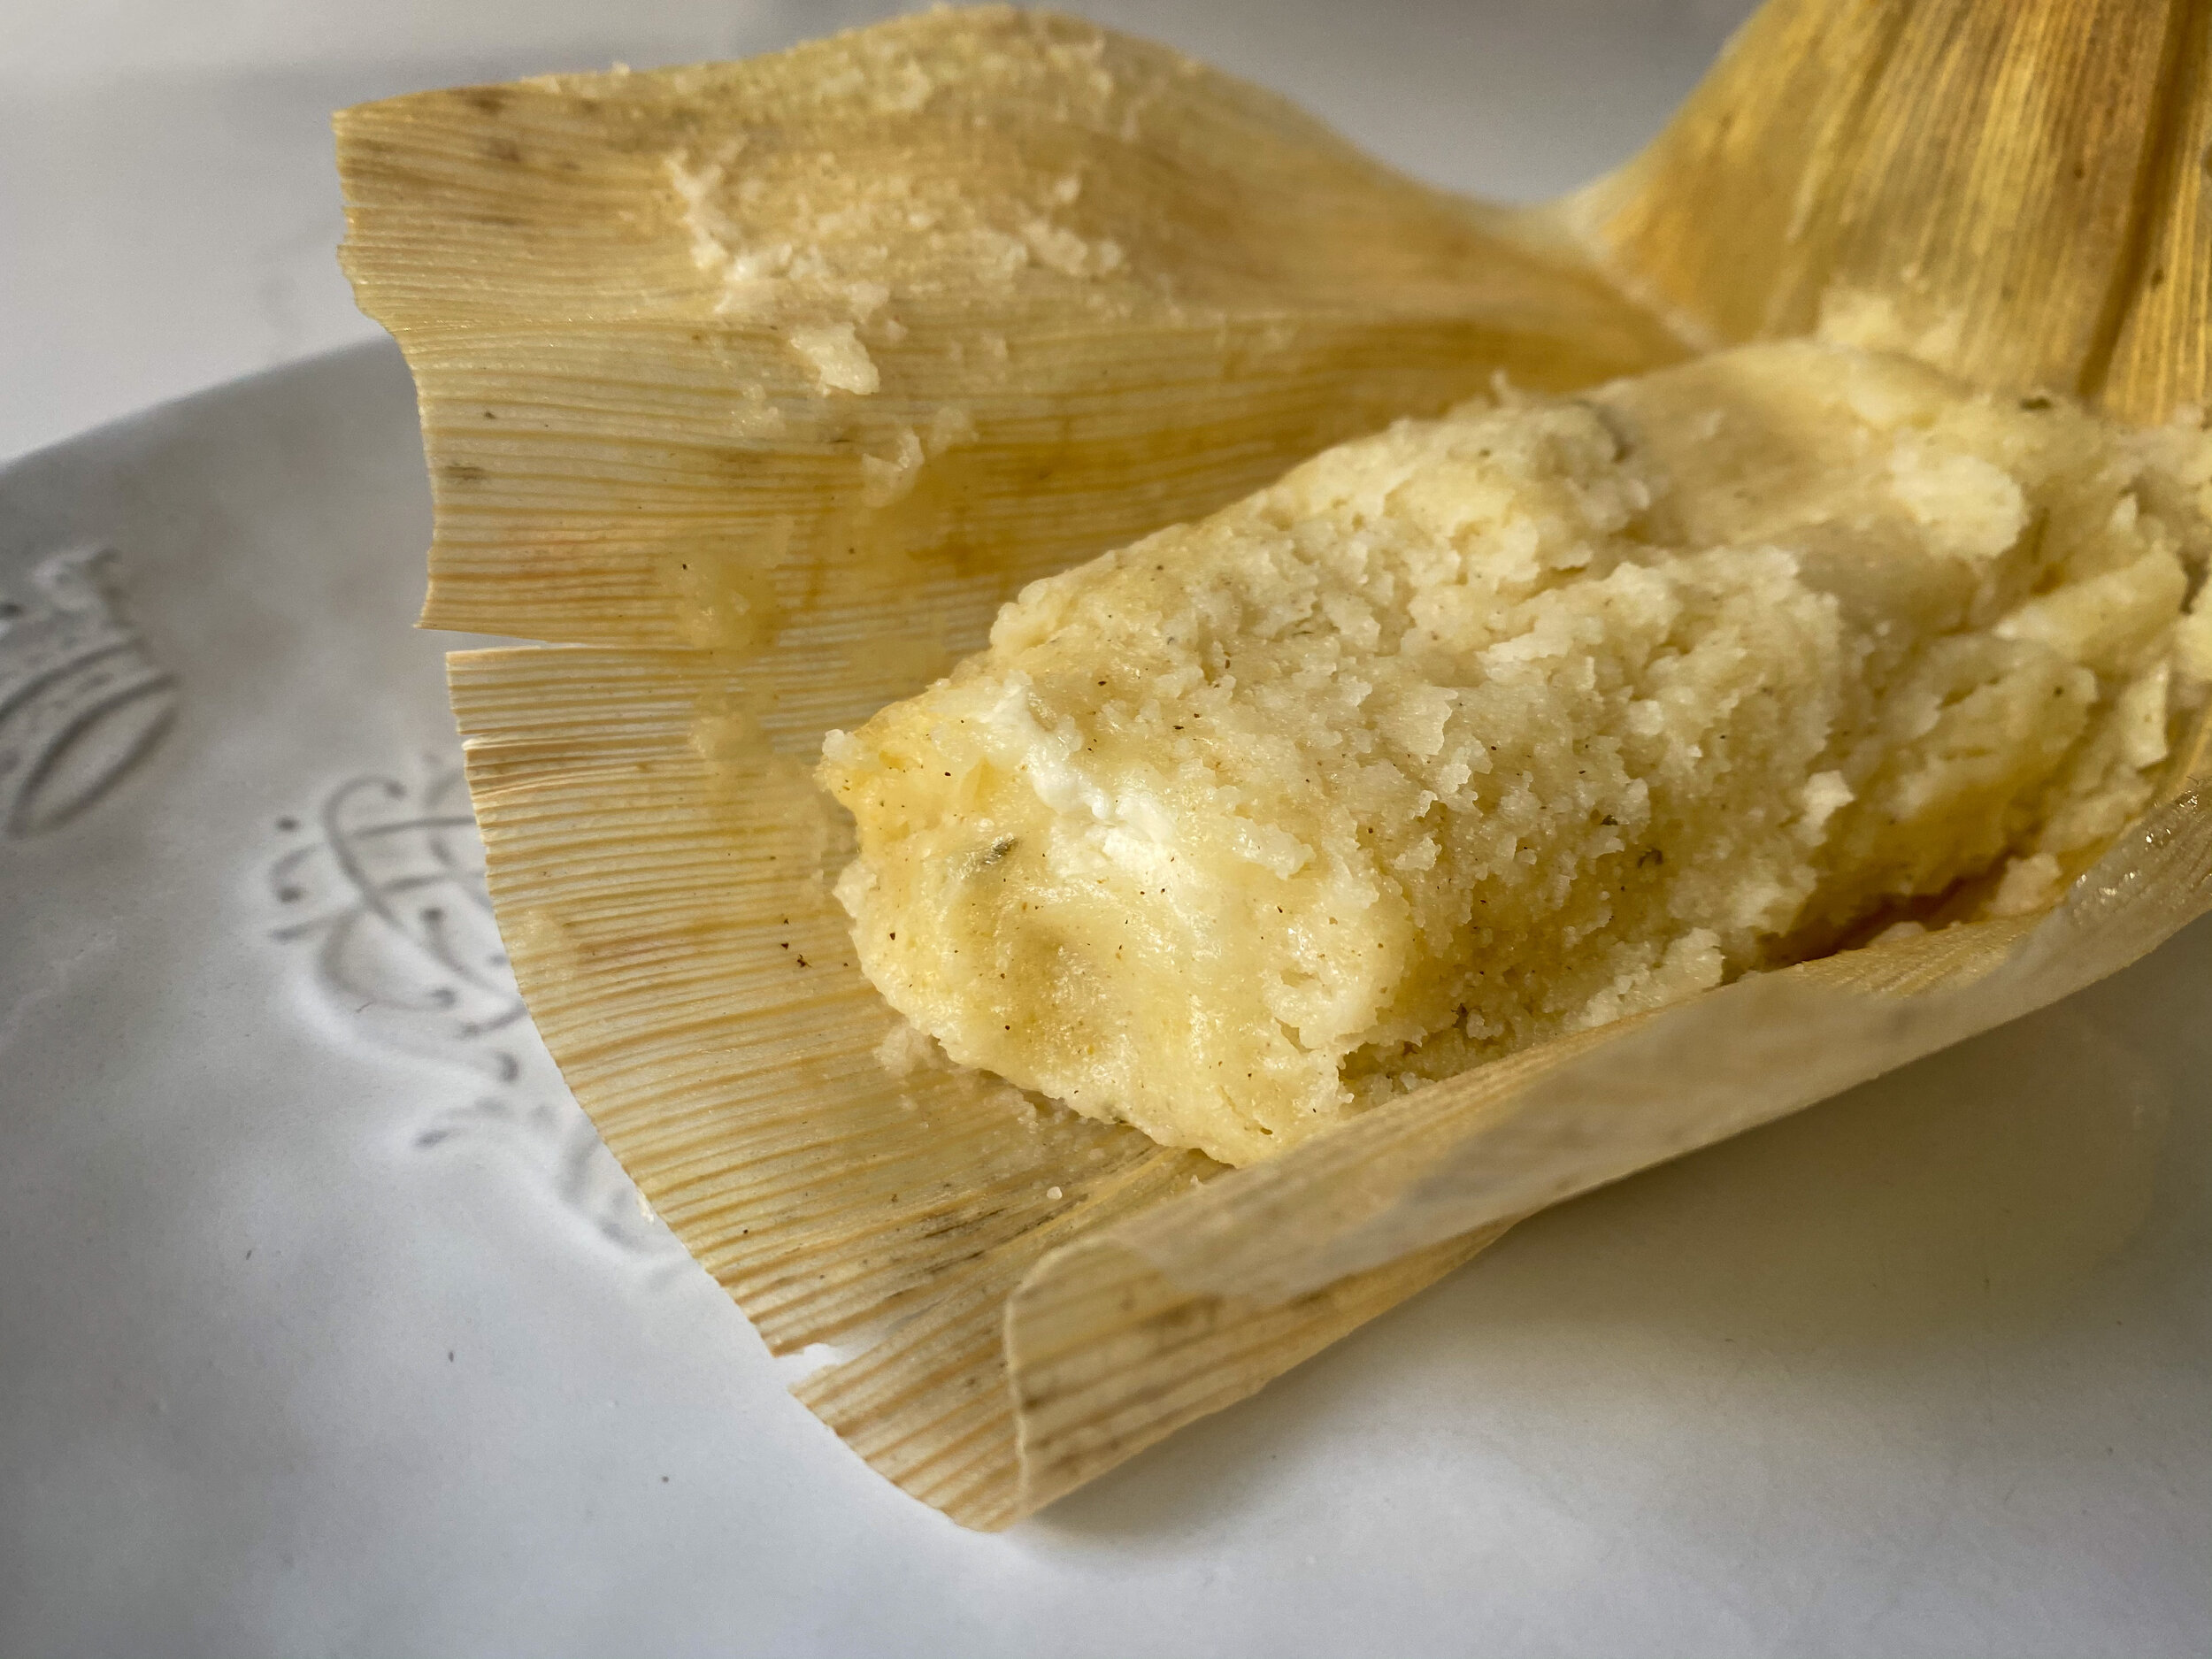
Masa hugging a center of goat cheese kissed by epazote. XXOO
I know what you’re thinking: What the fuck is epazote?
I’m glad you asked.
Epazote is a Mexican herb most famously used in black beans to reduce the emission of pungent odors from the people consuming said beans. But it’s used in a variety of traditional recipes: thrown in sprig form into pots of soup and sauces, or chopped and added at the end, just like you would cilantro. Its odor and taste are sharp and very strong. A bit like mint dipped in gasoline - but in the best possible way.
Look for it in Latin markets. If you’re very, very lucky, you may find it stuck in a vase of water on the counter looking exactly like my photo. Or, you may find as a wilted clump in the refrigerated section - that’s fine too!
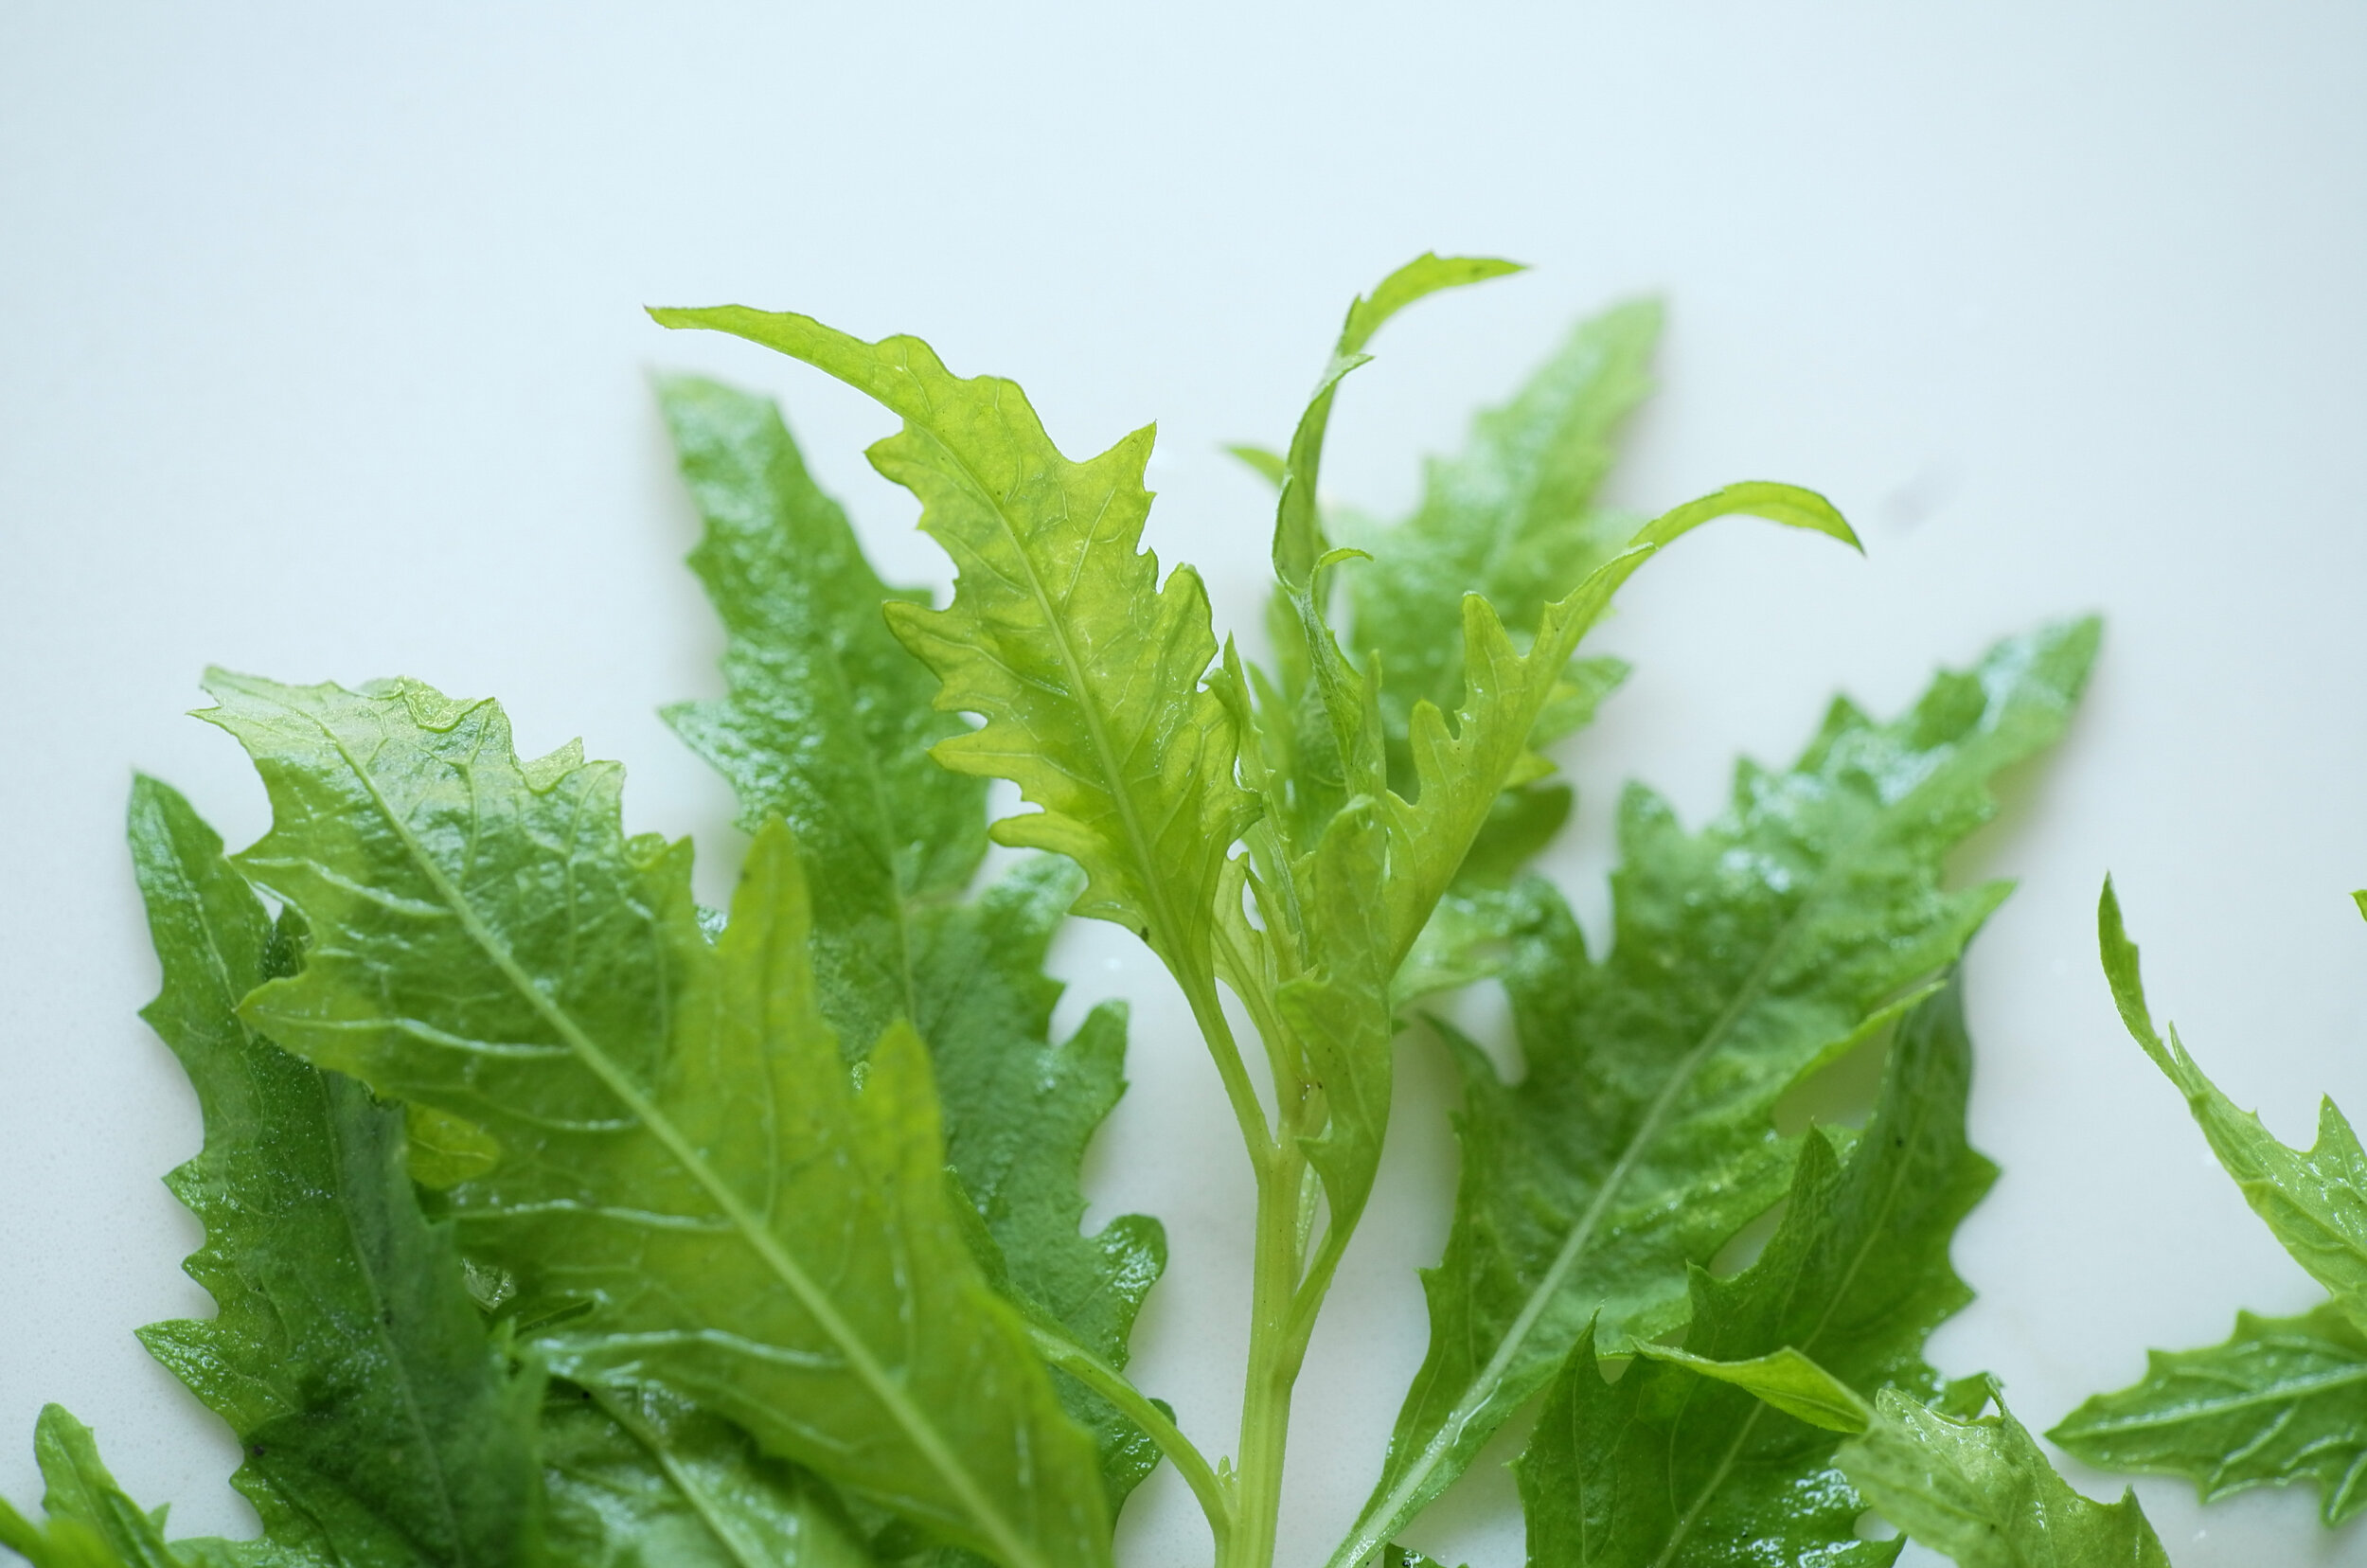
Fresh epazote.
And goat cheese? Well, for as much as it is used today, cheese didn’t have a role at all in pre-colonial Mexican or American Southwestern cuisine.
So maybe this is a fantasy tamale…Imagine a little plot of corn behind your mountain adobe; a goat grazing on the patch of grass next to it. You grab a handful of that pungent herb by the back door, a square of the goat cheese on hand, and grind a bit of your corn into masa. Hmm. Earthy corn. A creamy/tart filling spiked with bits of sharp green.
Blend a quick salsa verde. Now build a fire in that kiva fireplace as the sun slants through your windows and the wind plays through the juniper branches outside, setting shadows dancing on your walls. Pour a glass of añejo tequila and enjoy your tamales as the sun sets behind the Jemez mountains.
Sounds pretty fucking good to me.
Shit You Need
8 ounces fresh goat cheese
2 tablespoons minces fresh epazote (substitute 4 Tbs fresh mint if you can’t find epazote)
1 cup masa harina
3/4 cup plus 2 tablespoons milk
8 tablespoons softened unsalted butter
1 tsp kosher salt
8-10 large corn husks, softened in hot water

Keep Calm and justeffingcook
In a small bowl, mix the goat cheese with 1 1/2 tablespoons of epazote and set aside.
In a separate small bowl, mix the masa harina and milk.
Using a stand mixer with whisk attachment, a hand whisk or a hand mixer (or whatever combination of stands, hands, and whisks you deem appropriate), blend the remaining epazote with the butter. Incorporate the masa in 2 tablespoon increments, whisking until light and fluffy (10 min or so).
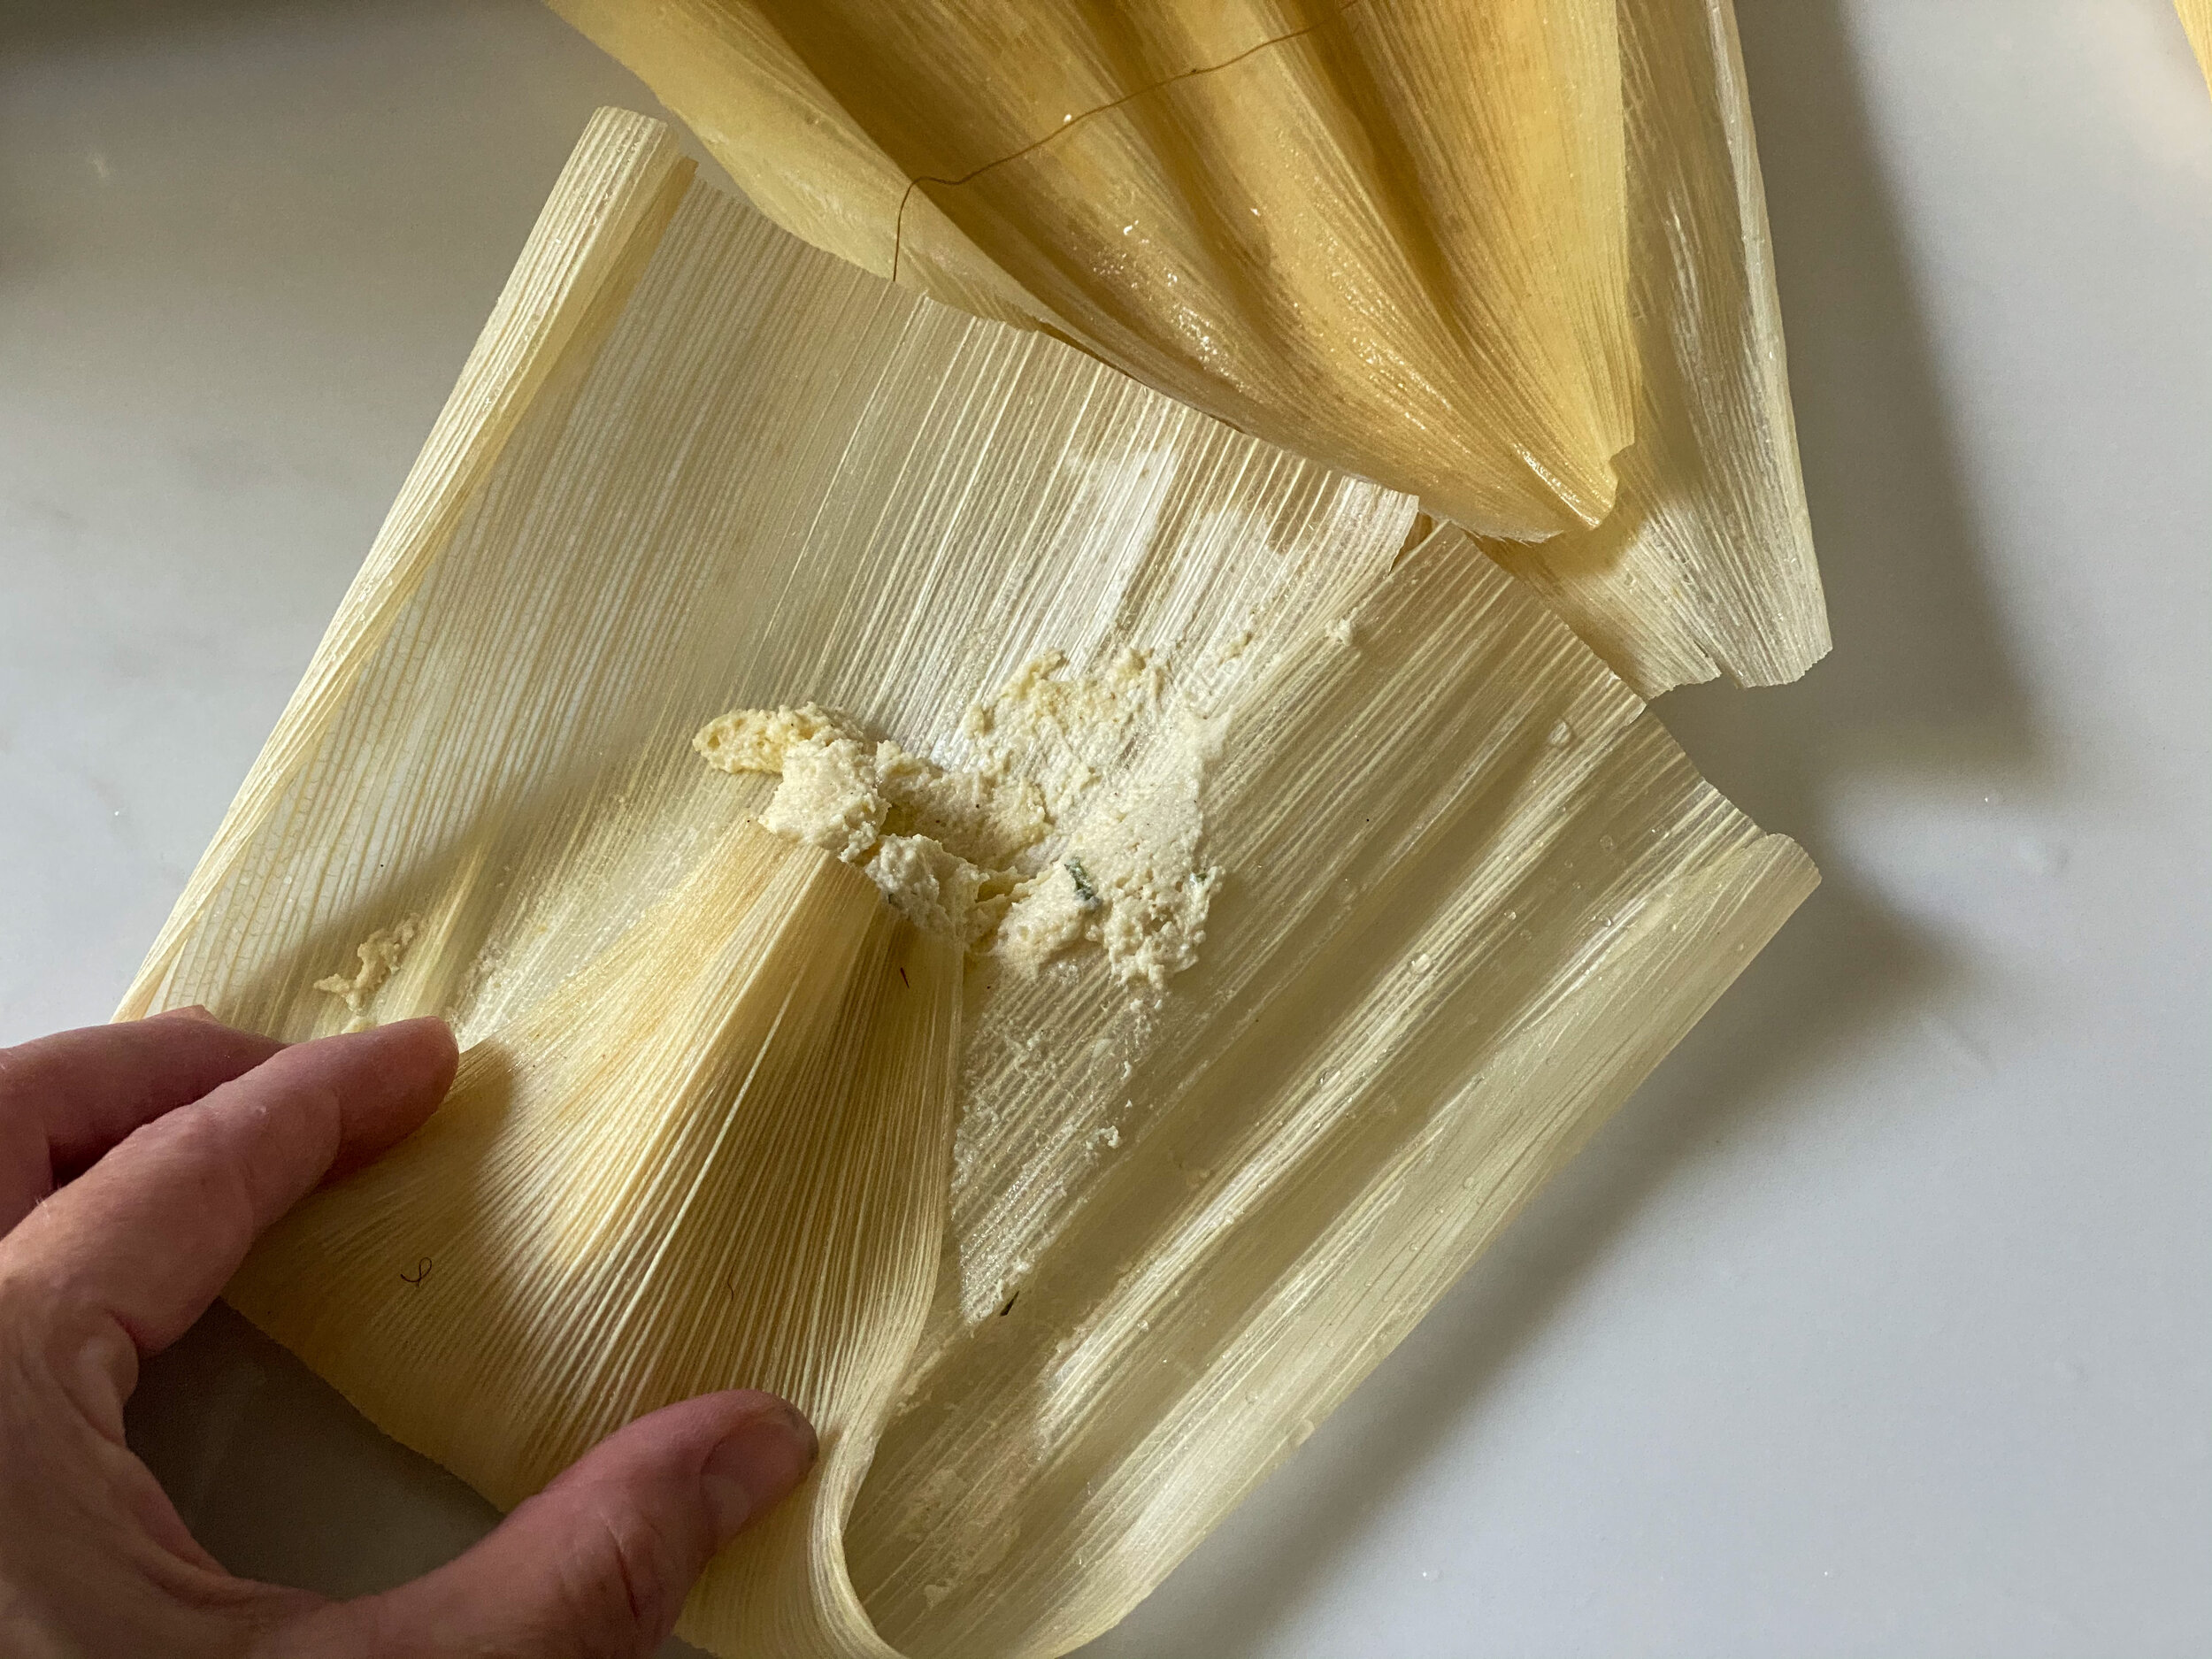
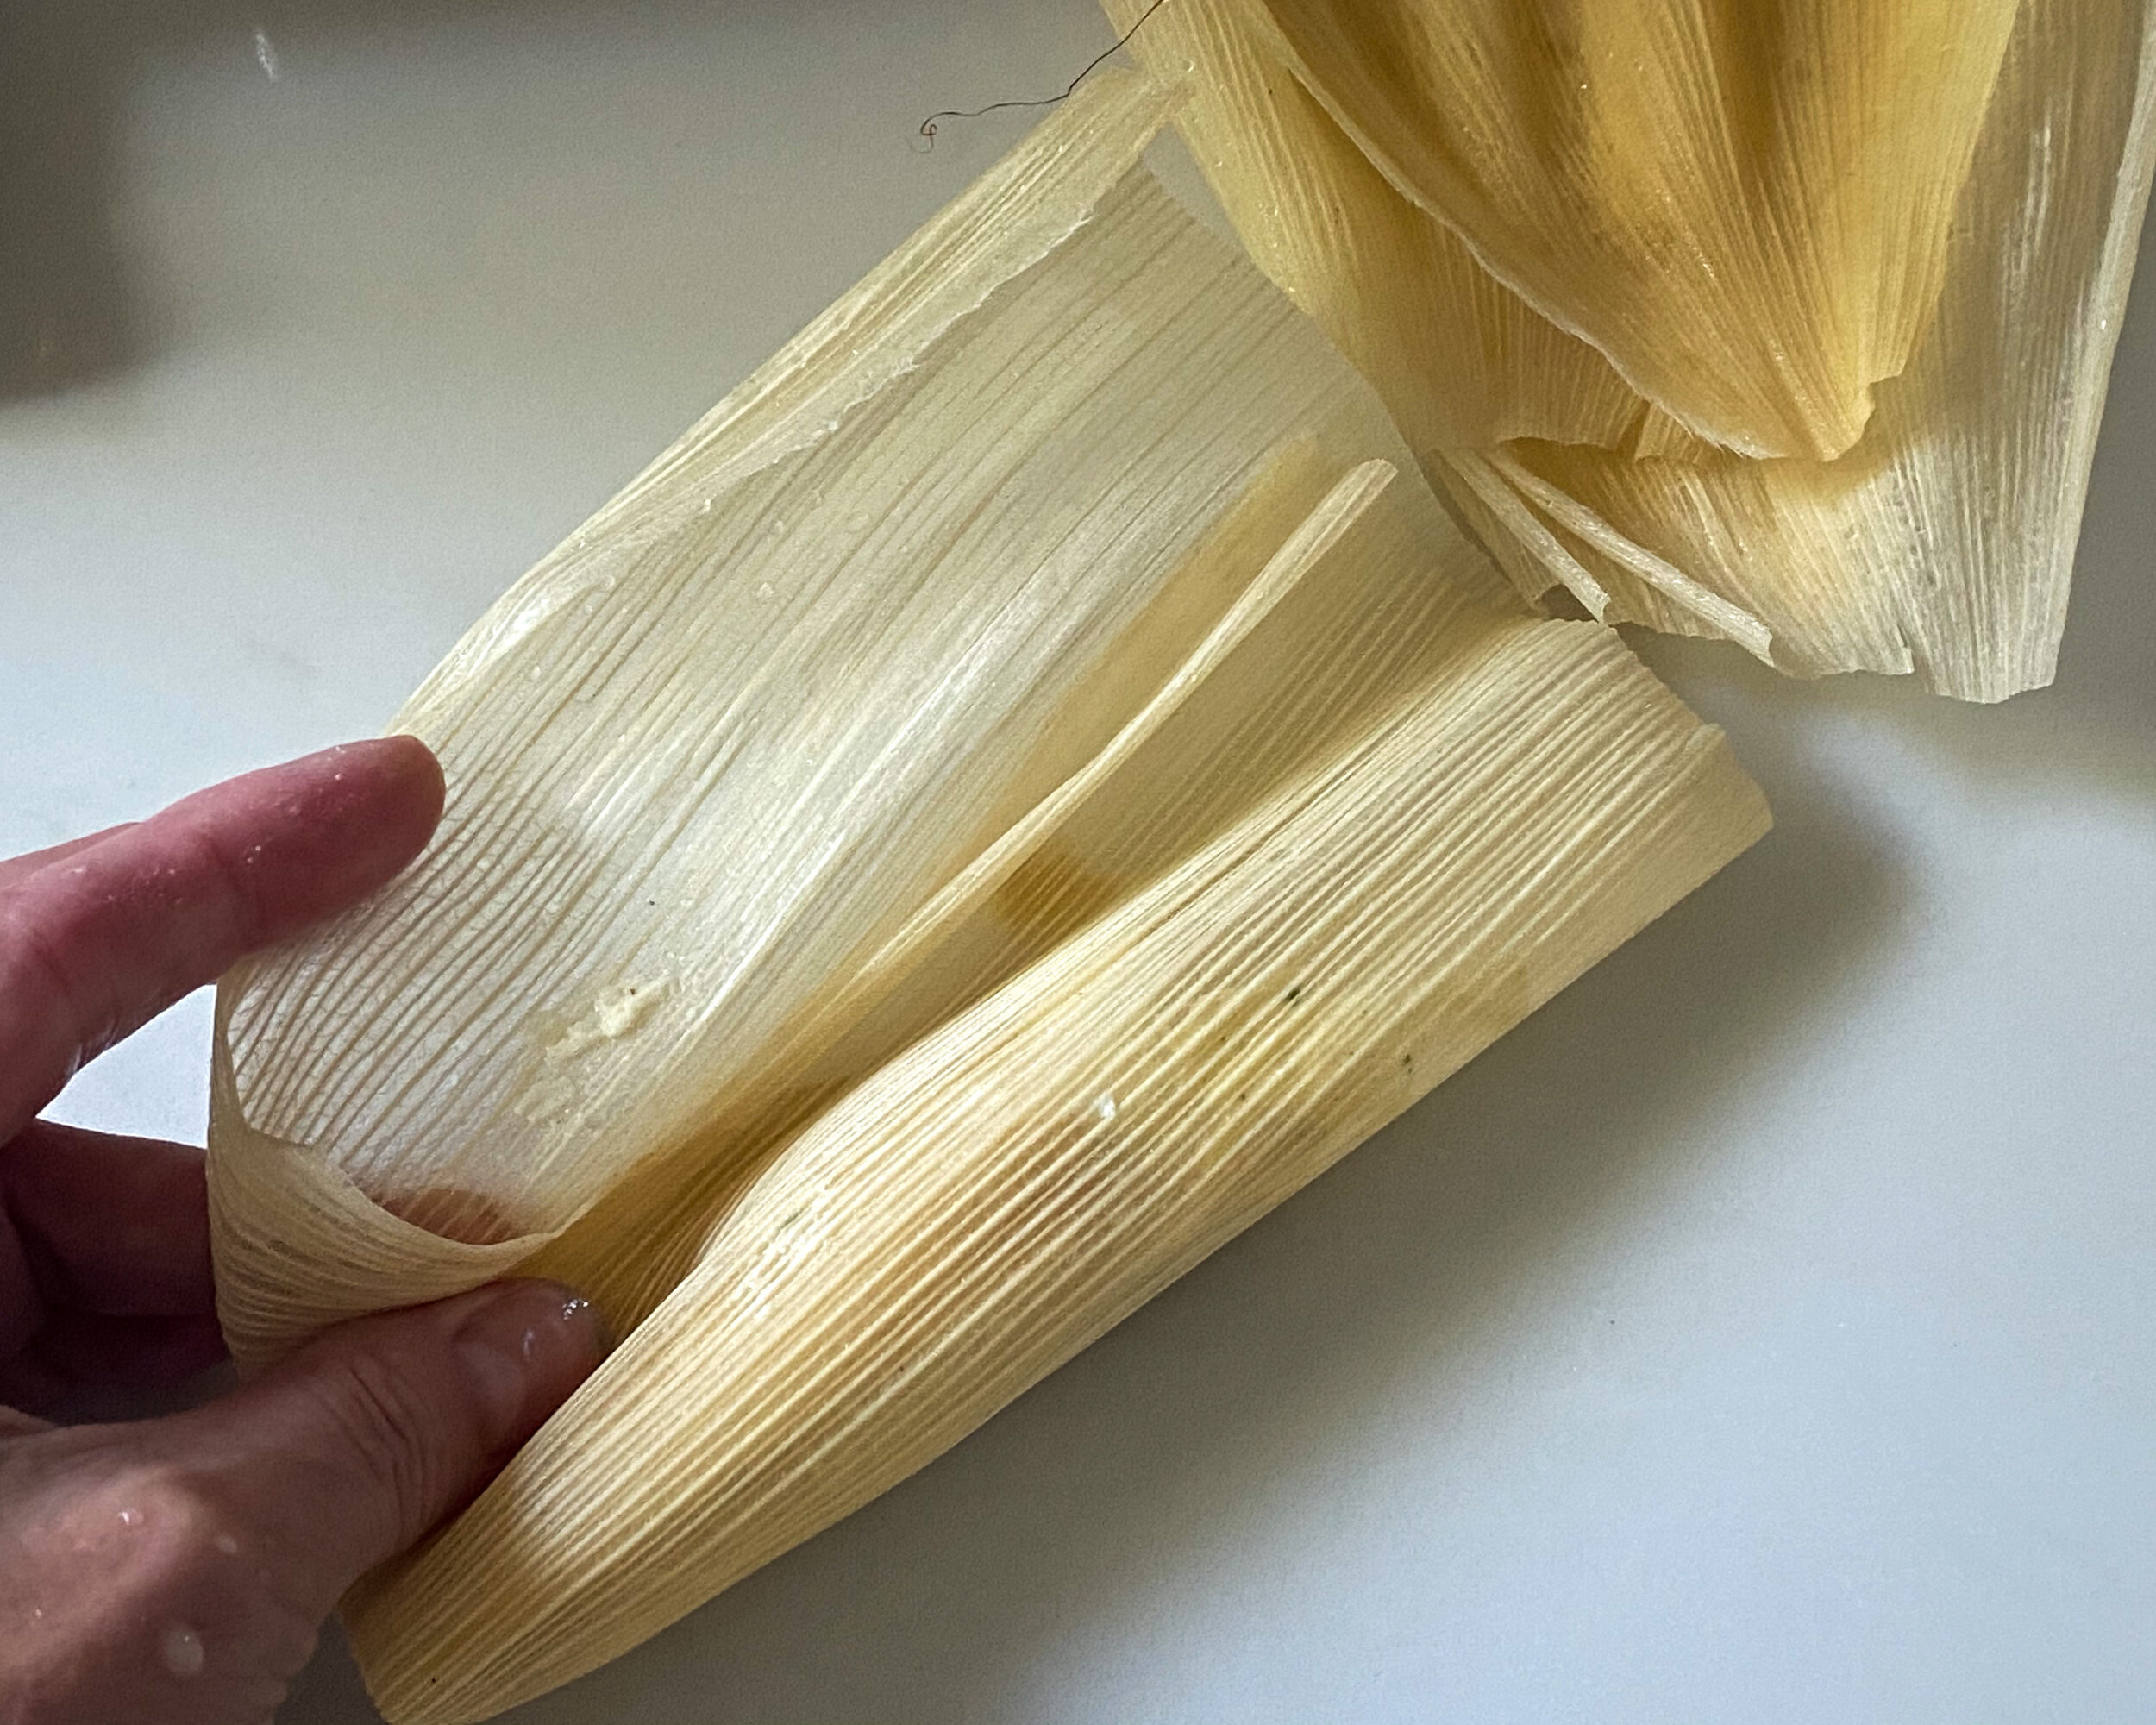
Dry the soaked corn husks and line them up for filling.
Divide the masa evenly between the corn husks, spreading into a rectangle. You can use the back of a spoon, or even dampened fingers to pat it flat.
Divide the goat cheese mixture evenly, forming each portion into a small log.
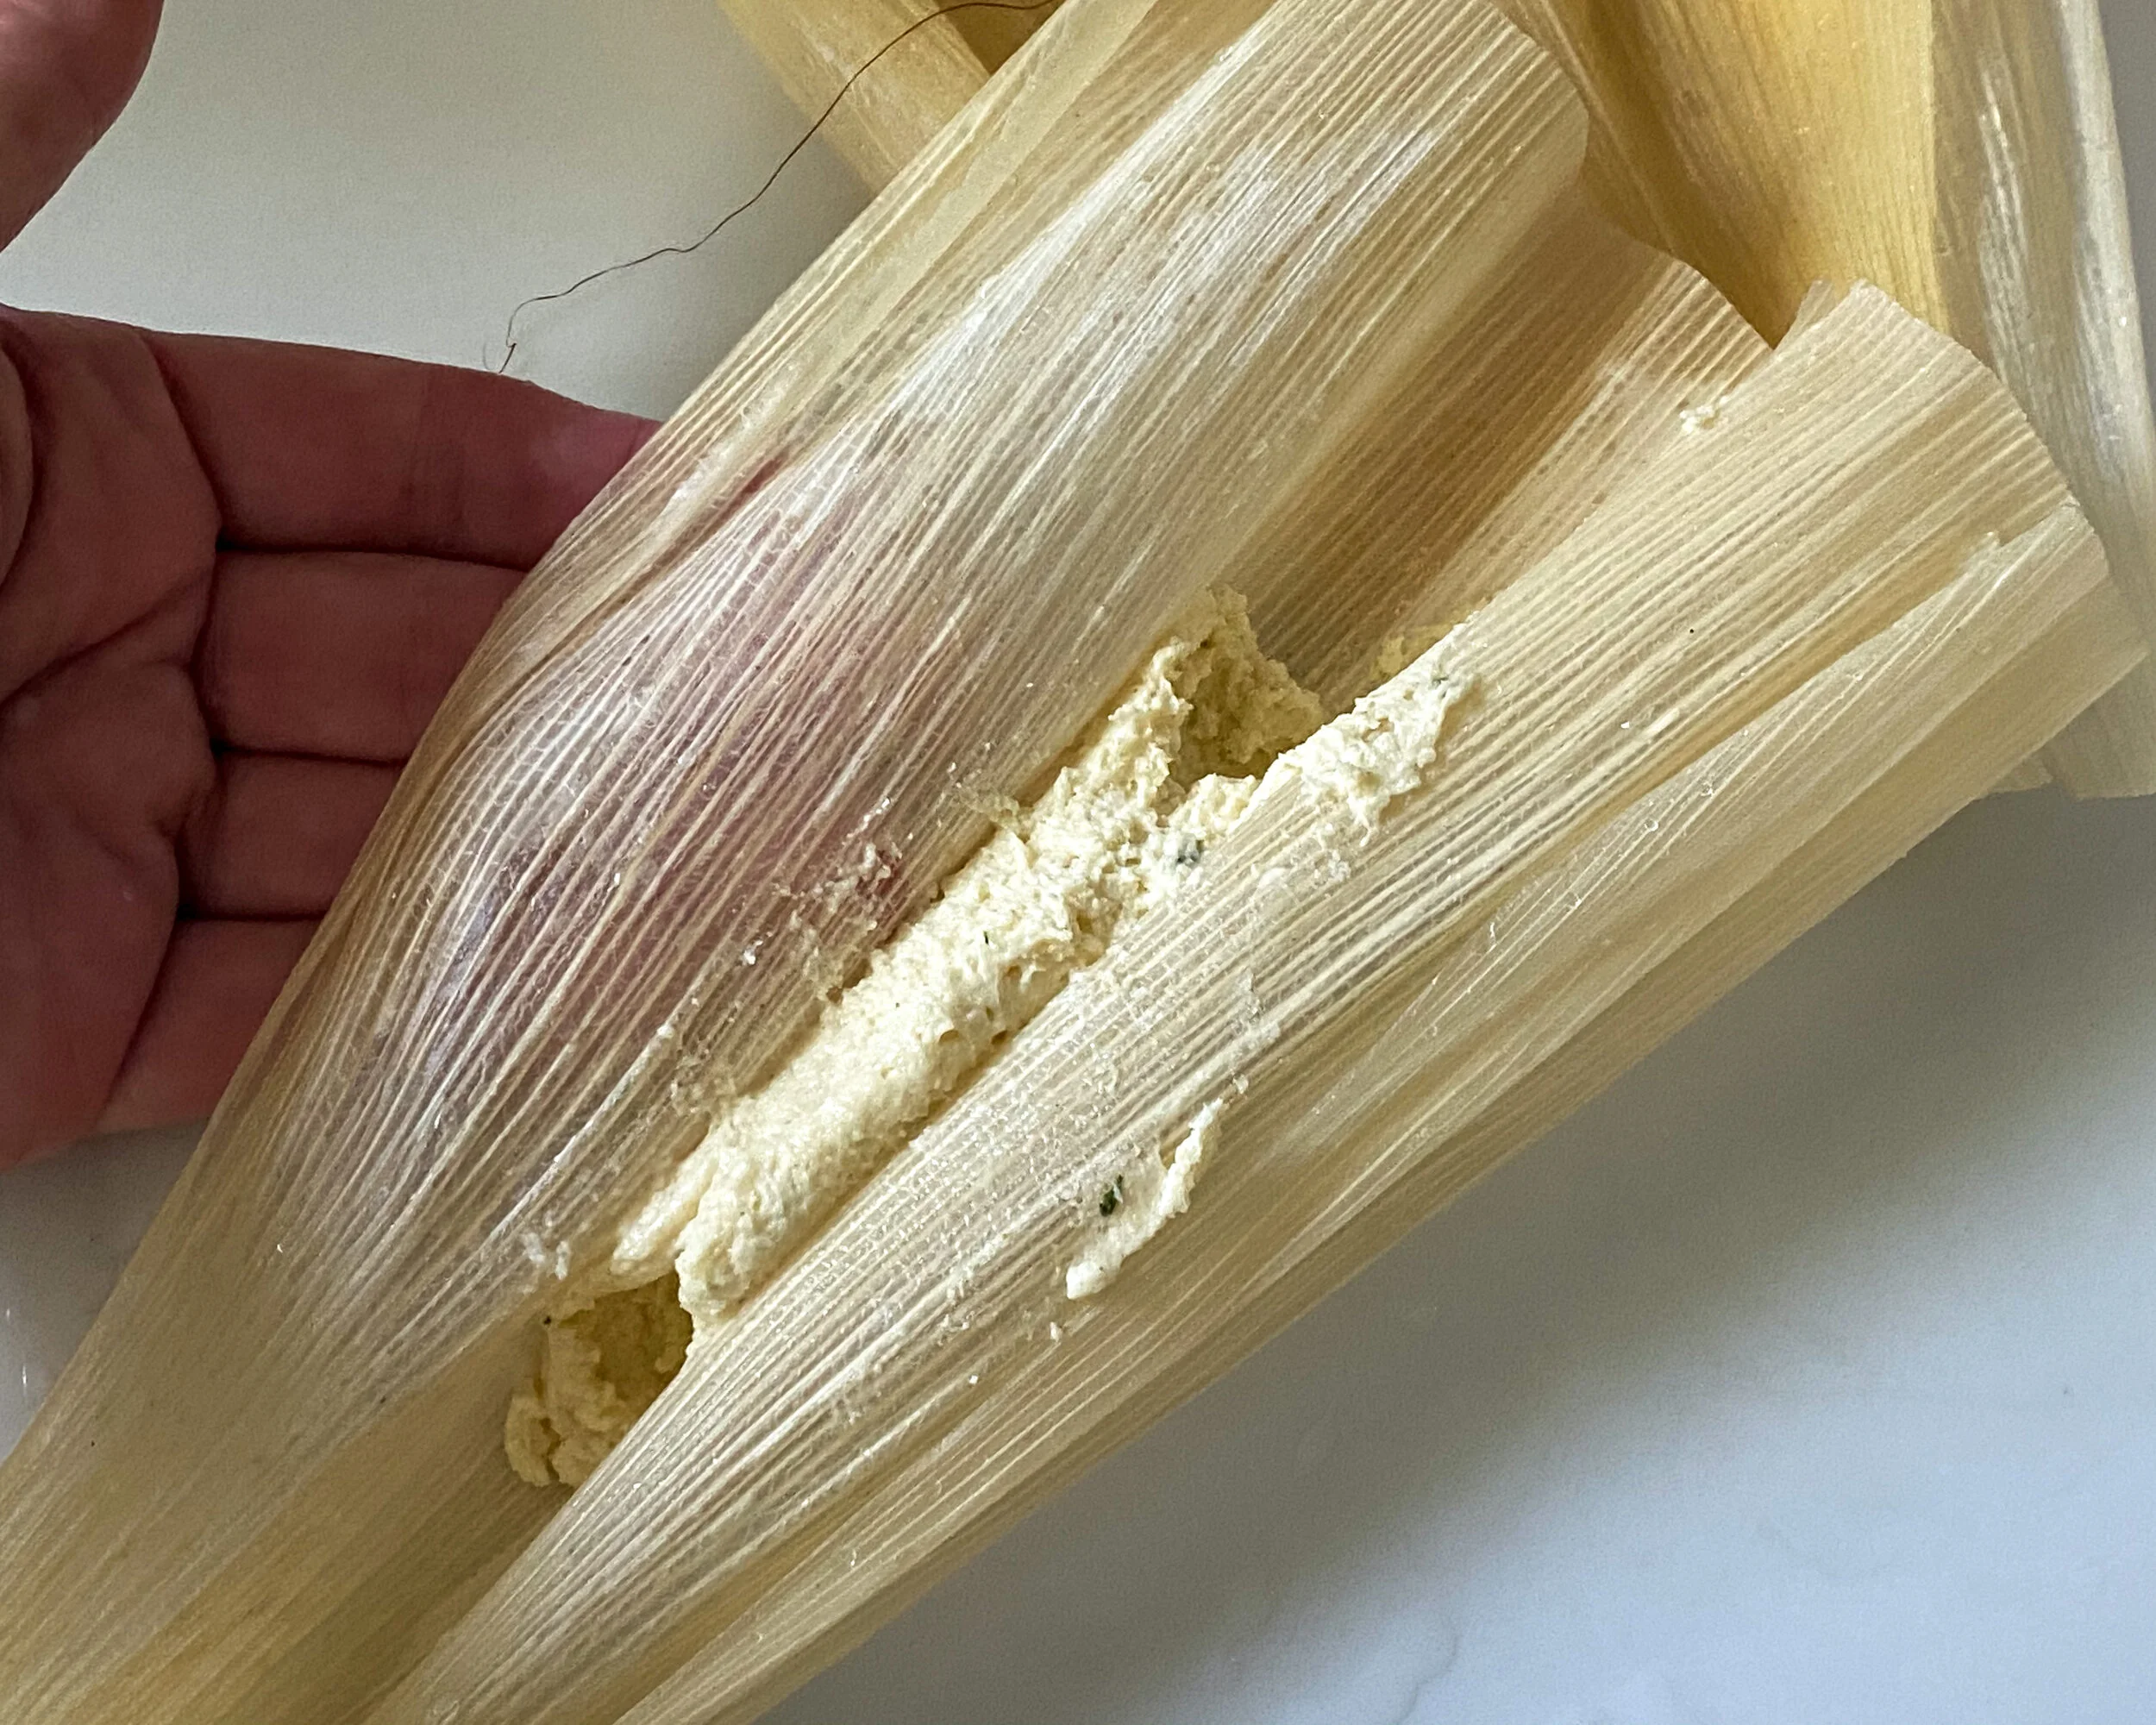
Place the goat cheese log in the center of the masa rectangle. Using the corn husk, bring the sides of the masa together and roll the corn husks between the fingers of both hands to seal.
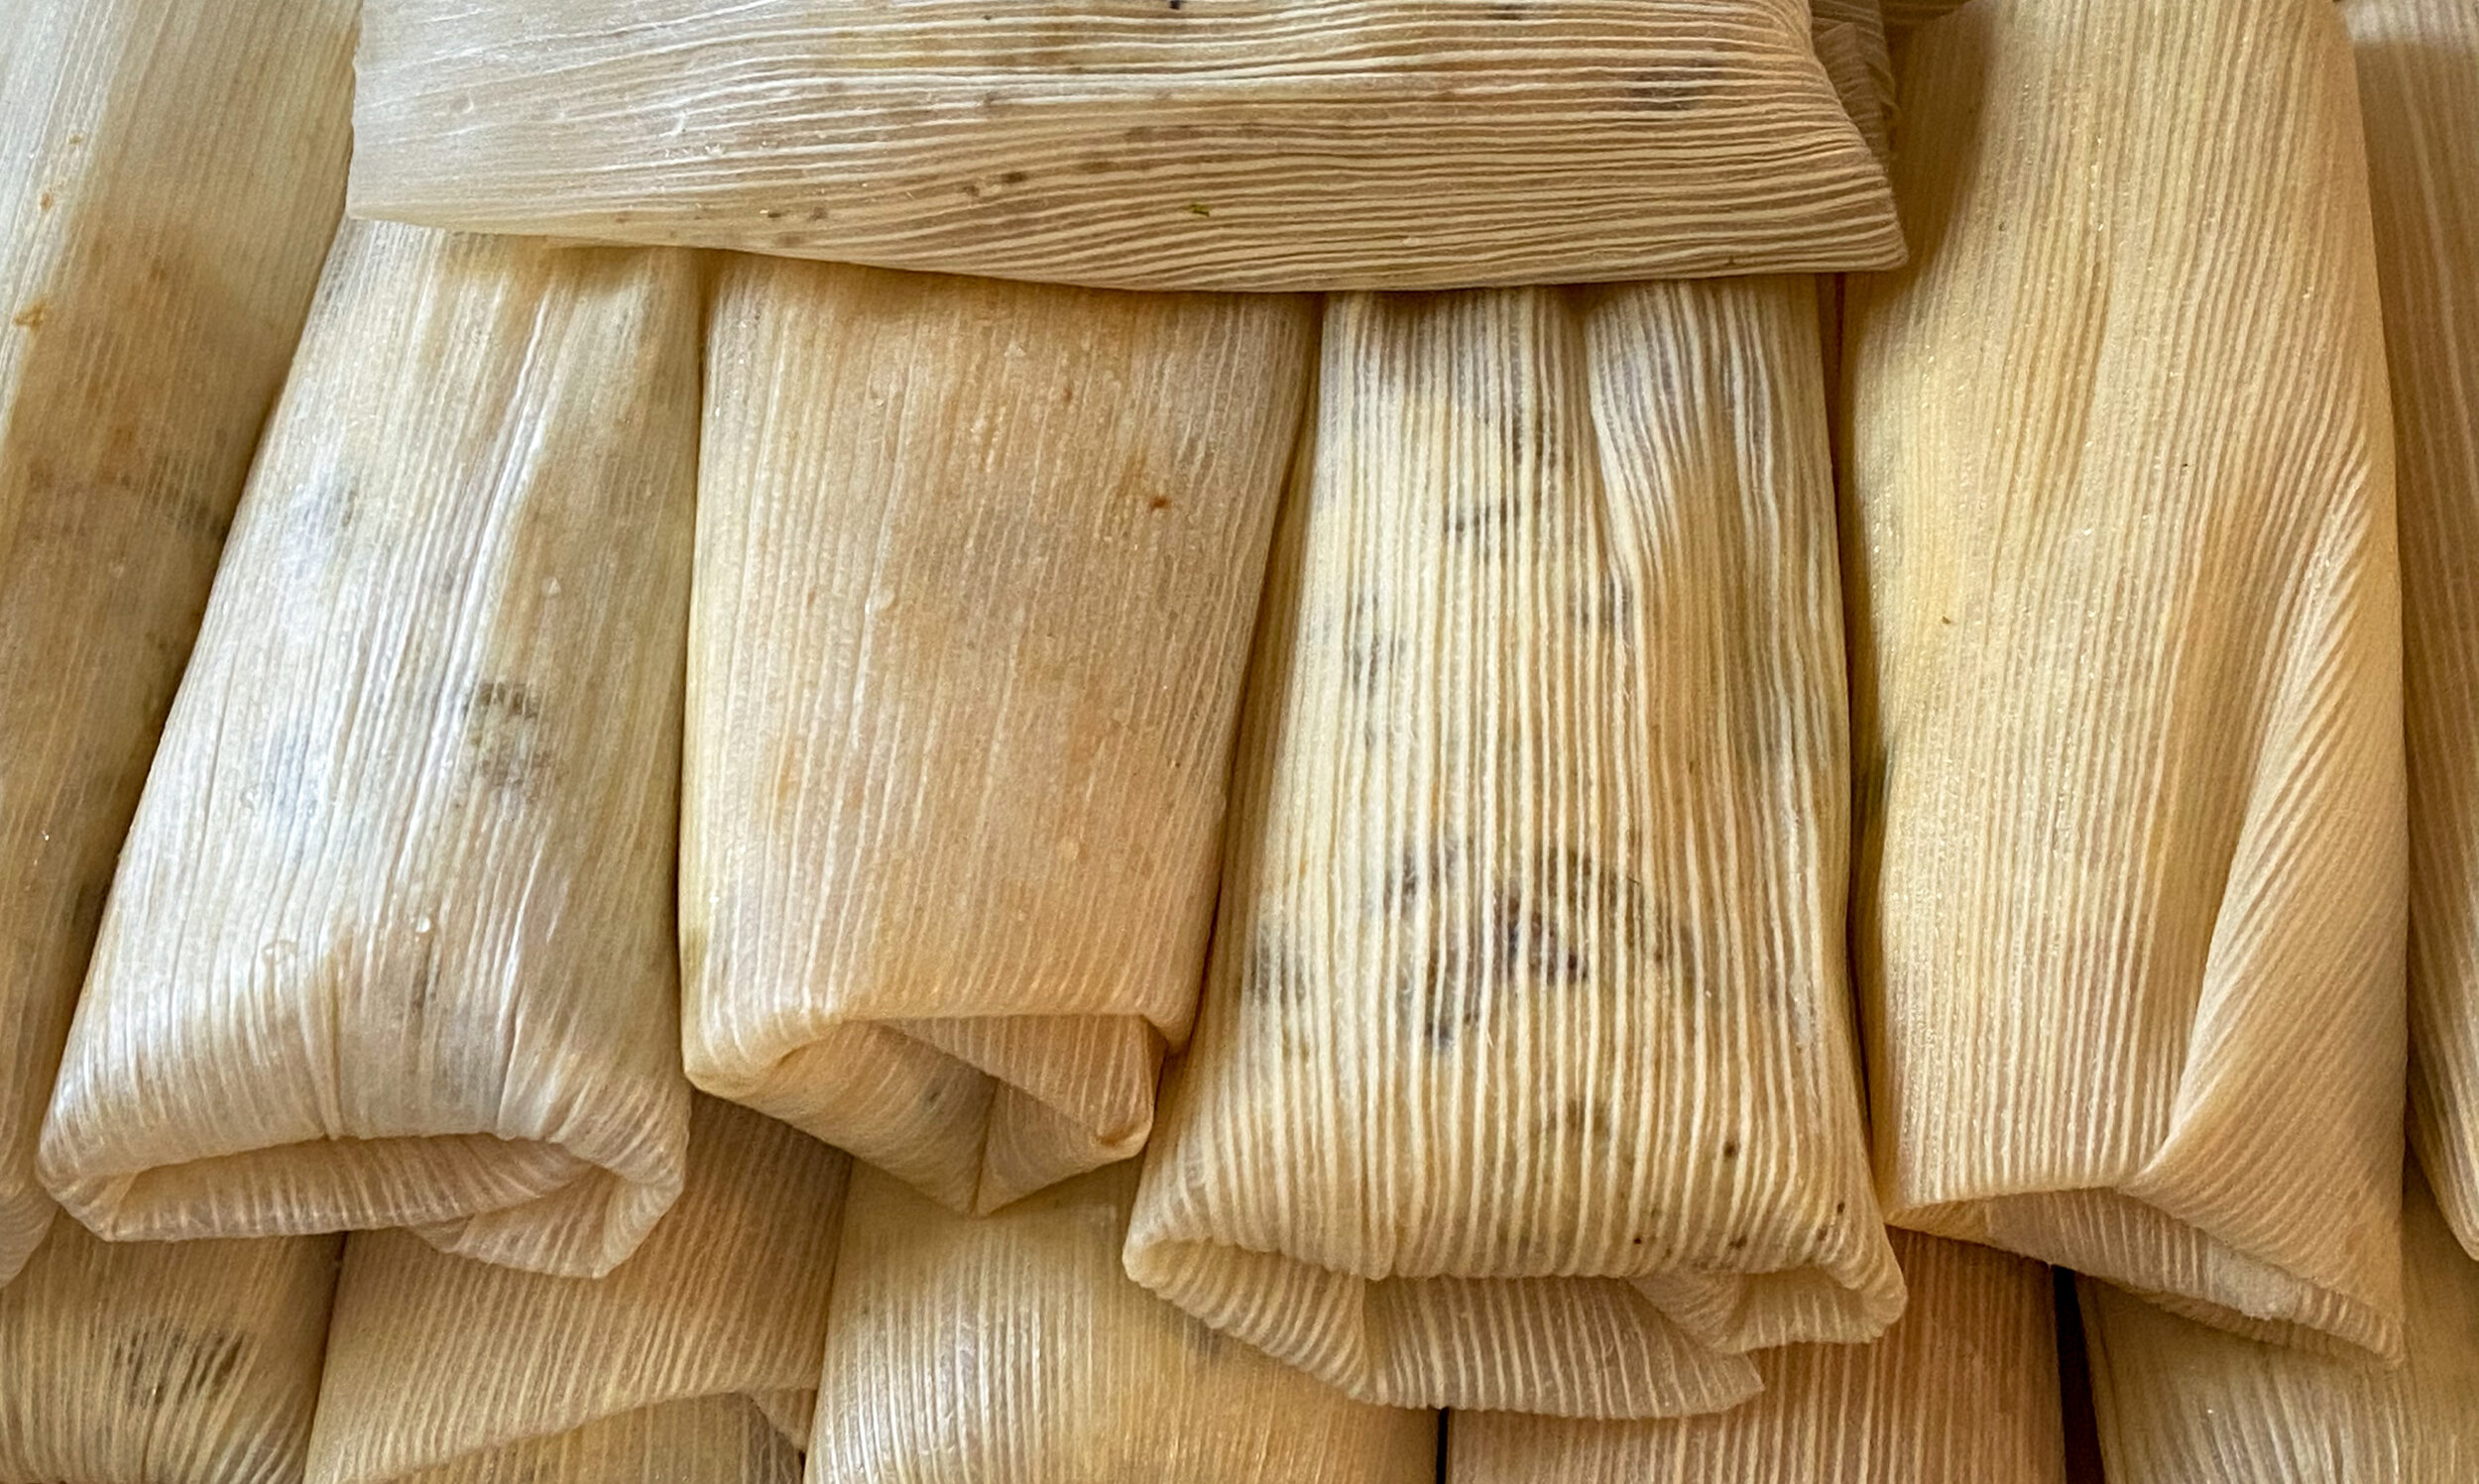
Fold up the bottom, then one side, then the second side to make a package with one open end.
Place the tamales, open end up, in a steamer insert over a pan of boiling water. Cover and steam 30 min.
If your steamer is too shallow to take them standing up, you have options. For instance, fold both the bottom and top of the husk over the filling, then each side. Or roll the tamale and use a strip of husk to tie each end closed. Either way, they can then lie flat in the steamer (seam down), and stacked.
Serve with salsa of choice - I like salsa verde with these.


Aww daaaamn!

Grilled Corn Tamales del Elote
Because we missed Fucking Delicious Friday this week, today is going to have to be Super-awesome Sunday. And boy is this one special: Tamales del Elote, or sweet corn. These are my favorite tamales, which is sort of like saying, “My favorite ice cream,” or, “My favorite Christmas ever,” or, “My favorite million-dollar lottery win.”
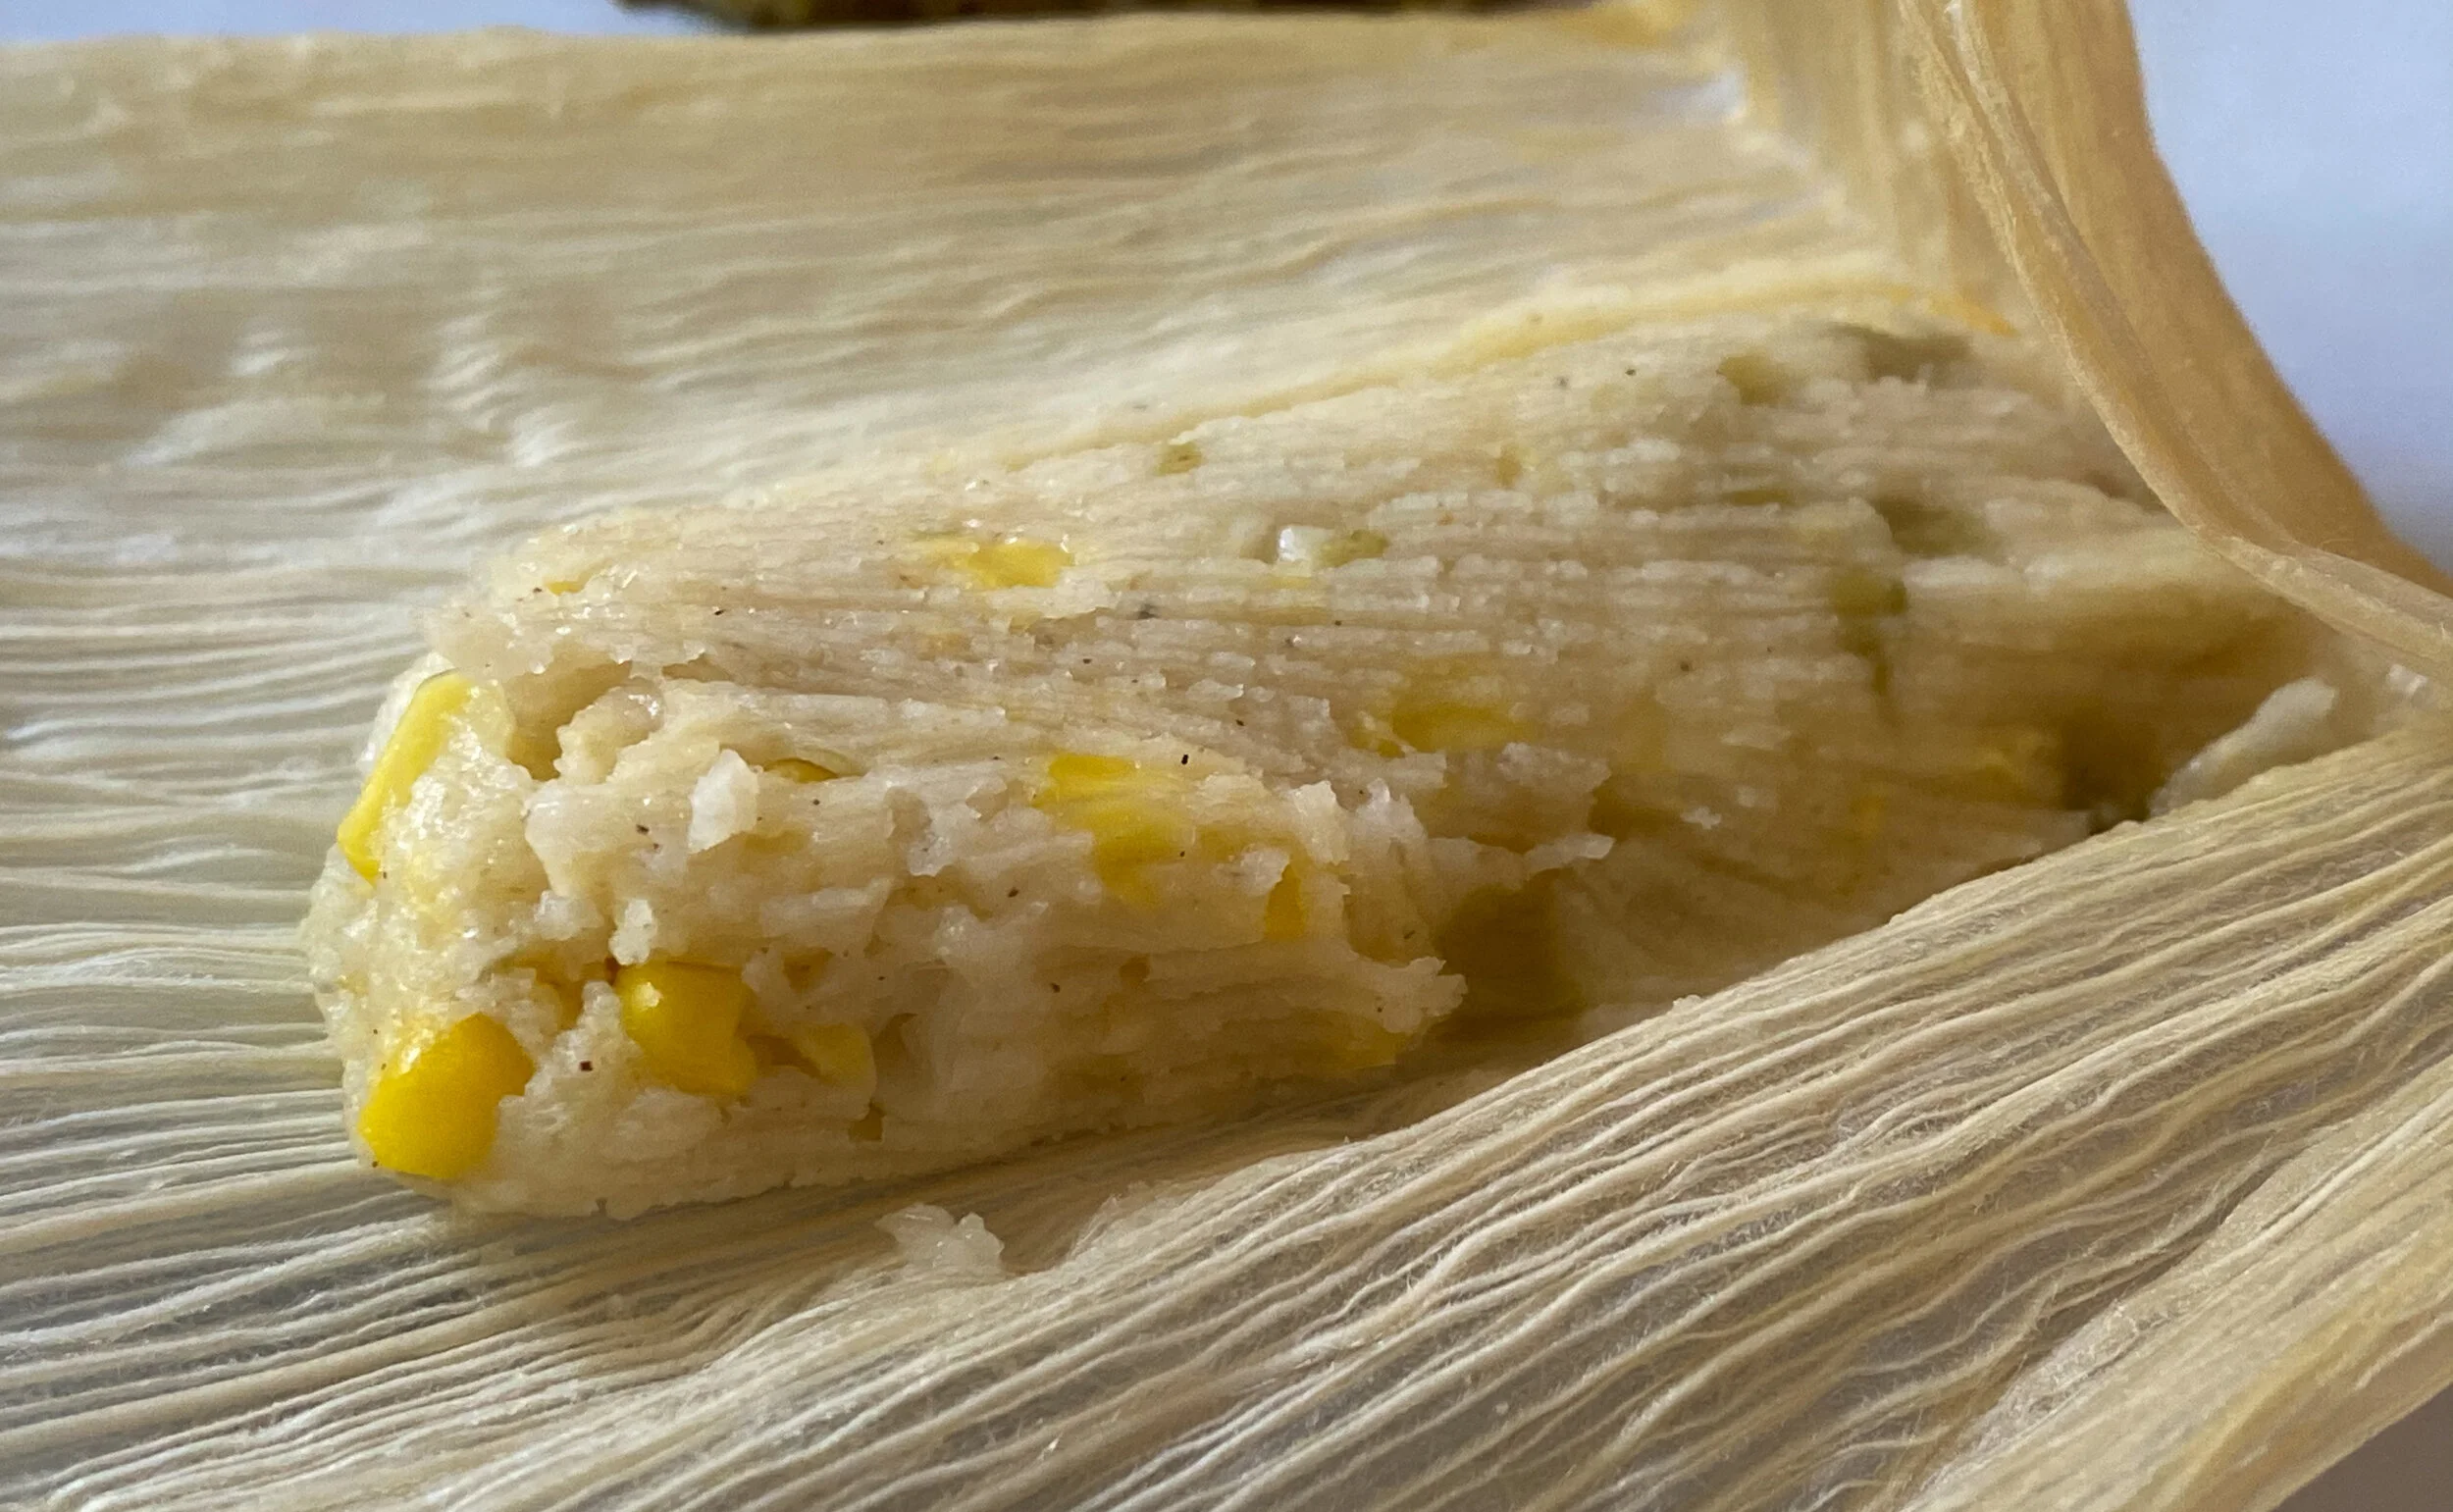
Fresh corn, green chile, and lots of butter.

Tamales del Elote.
Because we missed Fucking Delicious Friday this week, today is going to have to be Super-awesome Sunday. And boy is this one special: Tamales del Elote, or sweet corn. These are my favorite tamales, which is sort of like saying, “My favorite ice cream,” or, “My favorite Christmas ever,” or, “My favorite million-dollar lottery win.”
Tamales represent tremendously important part of world cuisine. They have a long history that I can’t even begin to touch on - they are nine thousand years old, after all. They are a symbol of family and celebration and community to millions of people.
Tamales are not a part of my cultural history. But I love them and thank the brilliant Mesoamericans who invented them, and all their descendants who perfected them, because they are wonderful, glorious little packages of All My Favorite Flavors.
For this particular recipe, I also have Mark Miller and the Coyote Cafe of Santa Fe to thank. It’s not 100% traditional. I mean, butter instead of lard in your tamales: Sacrilege? Brilliance? You be the judge. One thing no one can debate is that they are fucking delicious.
It starts will a little masa and a lot of fresh grilled sweet corn. Add some green chiles for heat and a little monterey jack to bind it all together.

Peel back the husks and de-silk those bastards - they’re going on the grill.

Yep, I am going to make you grill sweet corn. It’s not that hard. Don’t whine or I will make you roast your own goddamned green chiles.
Besides, roasting corn might be the hardest part of the whole recipe. These tamales don’t have any filling, you see, just masa batter. Plunk that shit unceremoniously on your corn husk and fold it like a Christmas package…full of butter.
And if butter isn’t on your Christmas list, get thee back to Google. You’re dead to me.
Shit You Need
15-16 Dried corn husks, for rolling. For some recipes you can use fresh corn husks, leftover from whatever you’re doing with your fresh corn. But in this case, you are going to char the shit out of those husks, so you gotta go with the backups in your pantry.
4 ears of fresh corn
1 cup milk
2 cups masa harina
1 1/2 cup unsalted butter, softened
2 tsp baking powder
1 tsp salt
1 cup roasted, finely diced green chiles.
Options, from most to least hard-core: 1. Buy fresh Hatch green chiles (I like the Big Jim variety), roast, peel and dice. 2. Buy frozen green chiles and have them shipped from New Mexico. 3. Use jarred Hatch green chiles, or a can of Hatch branded green chile. 4. Use whatever canned green chile you can find. I won’t judge. Much.
1 cup shredded Monterey Jack cheese
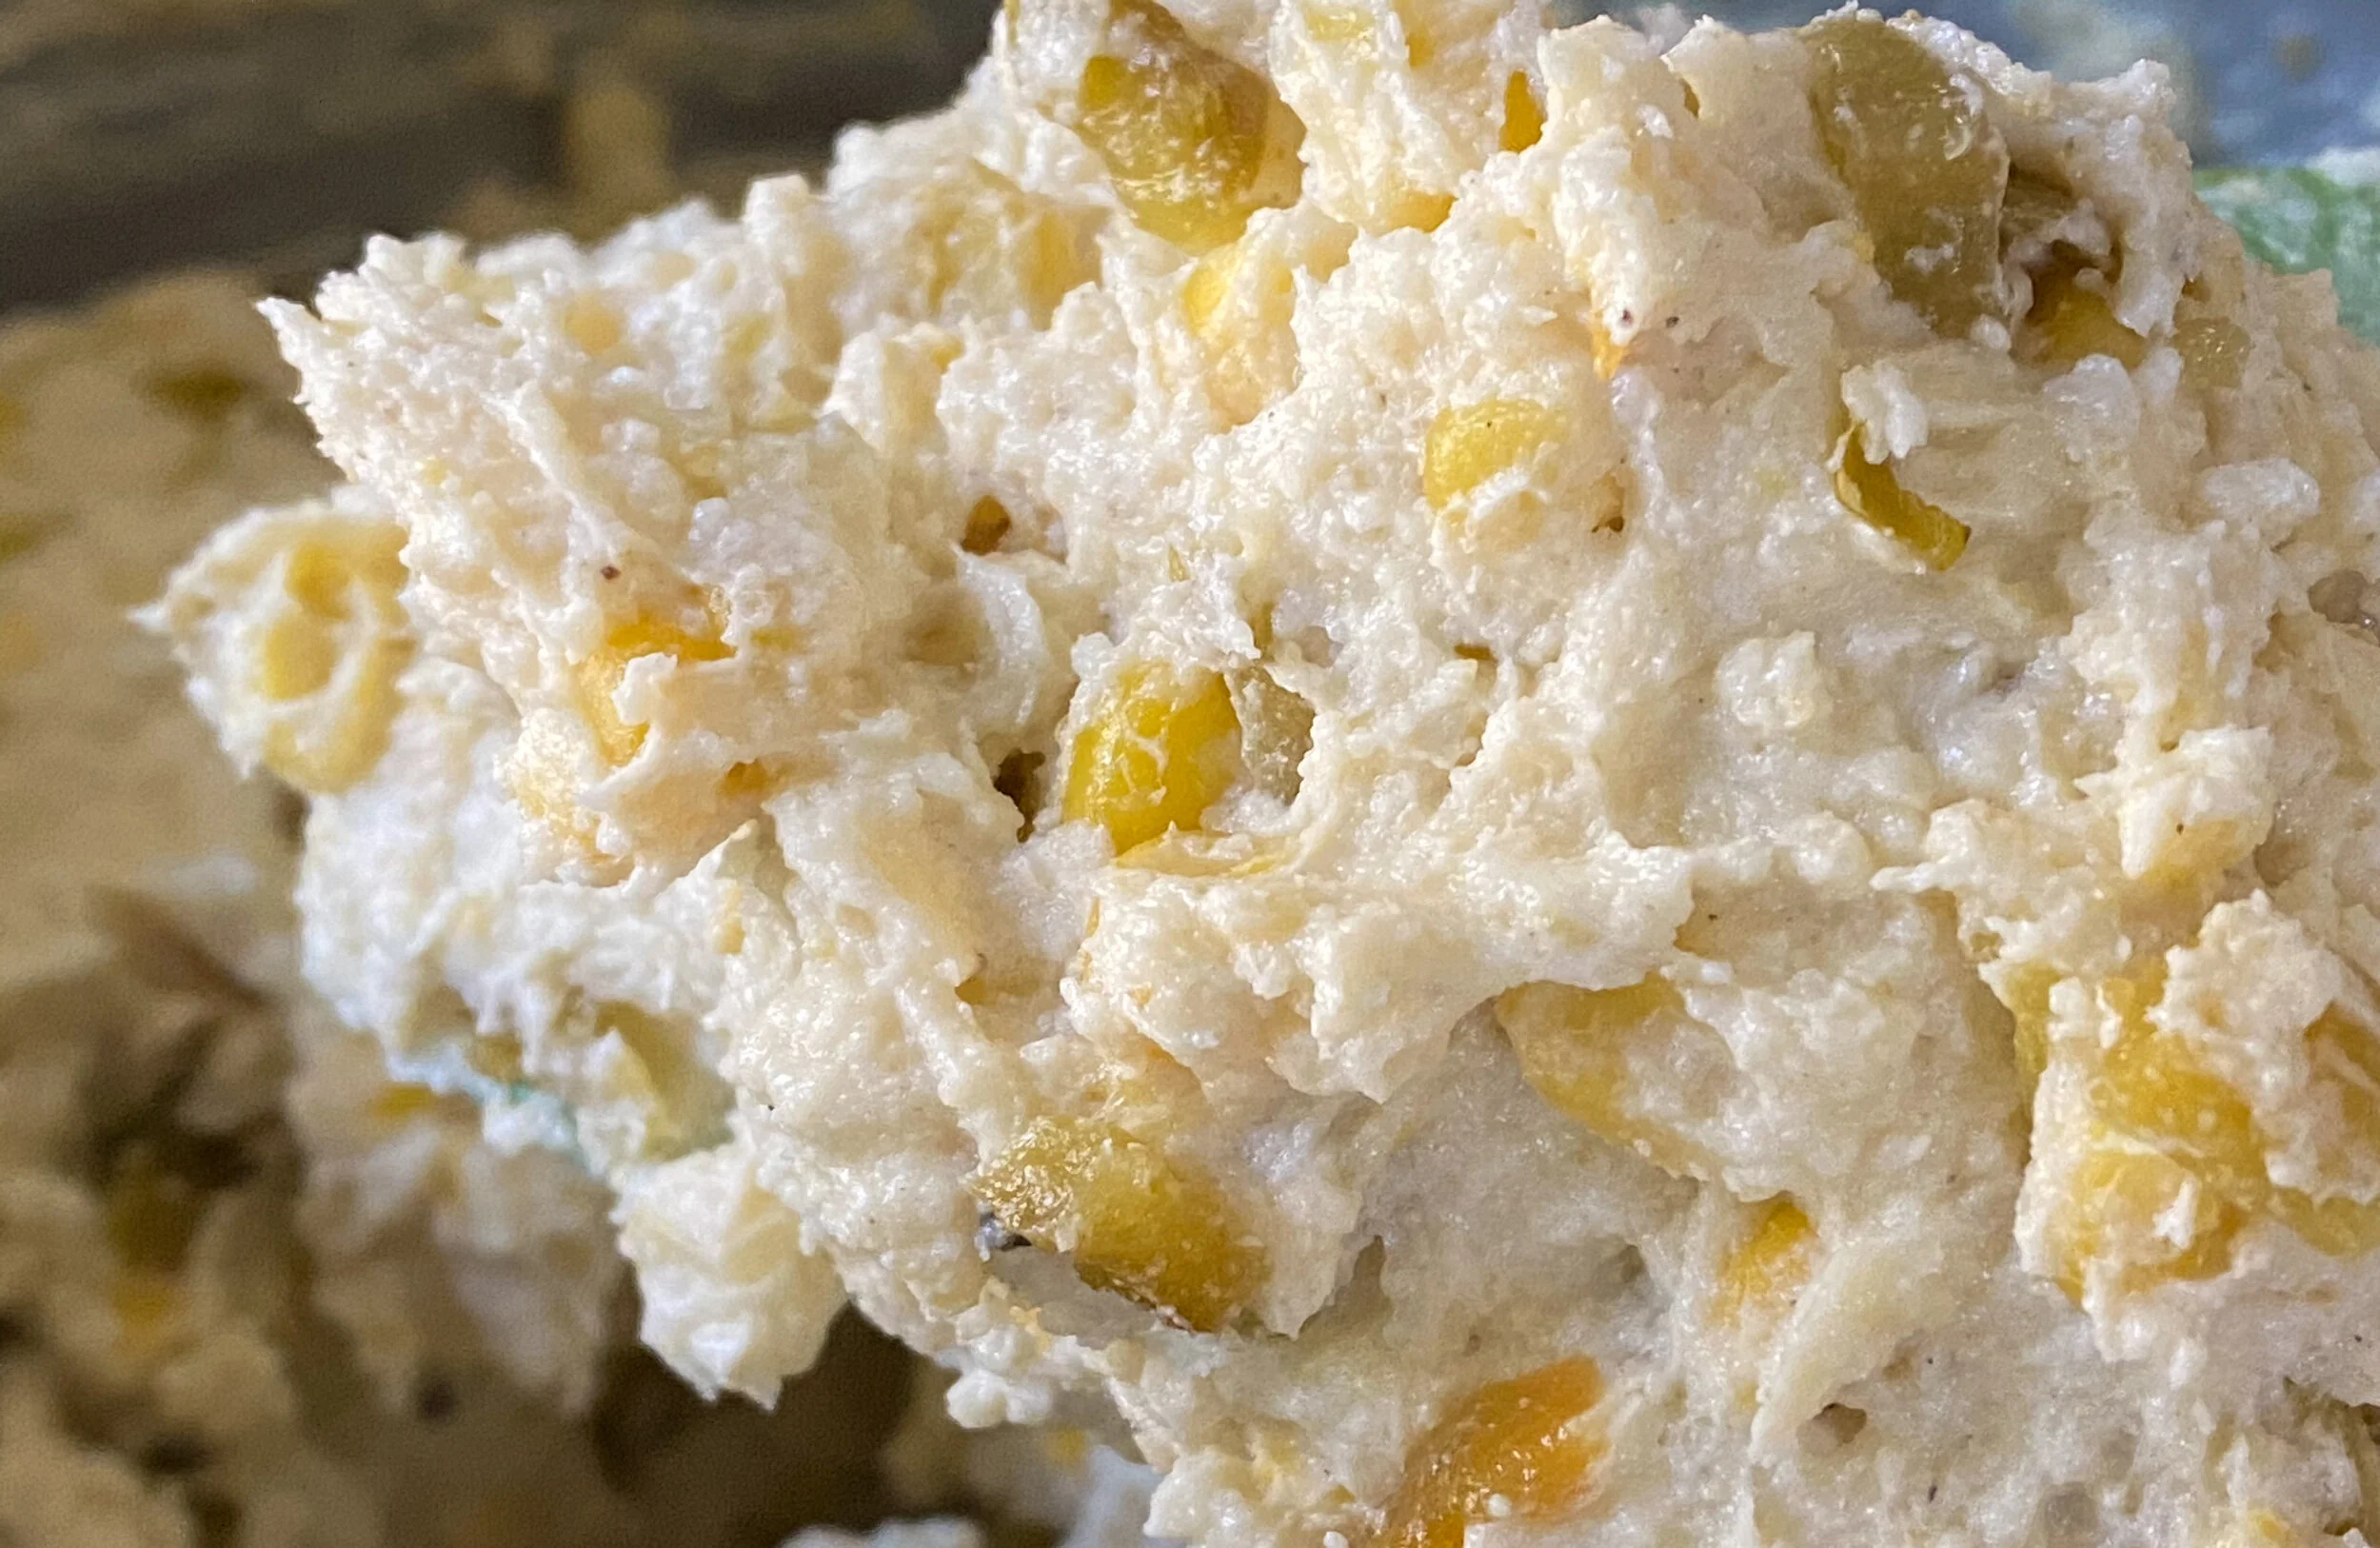
This is what your dough looks like after mixing: fluffy, and studded with all sorts of yummy.

You had me at Tamale.
Keep Calm and justeffingcook
Soak two dozen large corn husks in warm water until pliable. Leave them in water until you need them. (You’re soaking in it!)
Start your gas grill, or prepare your charcoal grill. Peel back the husks from the ears of sweet corn, and remove the silks. Fold the husks back in place, then soak the ears in cold, salted water for 10 minutes. Grill over medium heat for 20 minutes, turning every five minutes. Let cool, and remove husks.
Cut the kernels off the cobs: Holding by the narrow end, stand the cob upright in a large bowl. Using a large chef’s knife and starting halfway down the cob, slice the kernels off at the base. Rotate the cob to go the full circumference, then invert the cob and repeat on the other side. Easy peasy, corncob squeegee.
Place the corn in a medium saucepan, add the milk, and simmer until the corn has softened, about 10 min.
Remove 2 cups of corn kernels and set aside. Puree the remaining corn with the milk. Add to the masa harina and mix.
In a large bowl, whip the butter, baking powder, and salt until light and fluffy. Incorporate the masa one heaping tablespoon at a time, and keep whipping until even lighter and fluffier. I usually do this with a stand mixer, so I can walk away and prep my corn husks.
Fold in the reserved corn kernels, green chile, and cheese.
Select 15-16 of your favorite corn husks (large and pliable), dry them, and line them up on your counter.
Divide the dough between the corn husks ( a solid palmful in each, maybe 3 tablespoons) and fold into a little buttery package.
Use a steamer insert over a pot of boiling water. Place the tamales into the steamer, open ends up, and cook for 30 minutes.
Serve with salsa verde.

Buttery Tamales del Elote on a bed of bright, spicy salsa verde.